Ubuntu Server 16.04 x64 Deployment
Introduction:
Personally I'm pretty comfortable with linux, in fact this year marks a decade since I started using it (scary stuff). This guide is just something whipped up fairly quickly to demonstrate to those not quite so familiar with linux / ubuntu how a new ubuntu server installation can be done.
The following assumptions will be made:
- Deployment is being performed on a VMware ESXi environment
- CLI only access is required (asking for a GUI in linux is like asking for a well done steak, ask for chicken instead (i.e. windows)).
- Two network adapters are required, one with a default route and another with some specific routes
Implementation
Let's get started! First we'll need to obtain the ISO file to install Ubuntu.
The ISO file can be obtained from the Ubuntu website directly: https://www.ubuntu.com/download/server
If you're going to be using this server for more than a few months (i.e. pretty much anything) go for an LTS release. LTS stands for Long Term Support. These LTS releases will be supported for 5 years so are worth going with.
The current version of LTS is 16.04 the 16 refers to the year of release and the 04 is the month of release. Ubuntu tend to do two releases a year, once in April and once in October, so you will see 04 and 10 releases around. The 04 releases are more stable and used for the LTS releases, so I advise to use one of these.
Deployment:
Now we've got the ISO file, should be something like ubuntu-16.04.1-server-amd64.iso we can begin the installation.
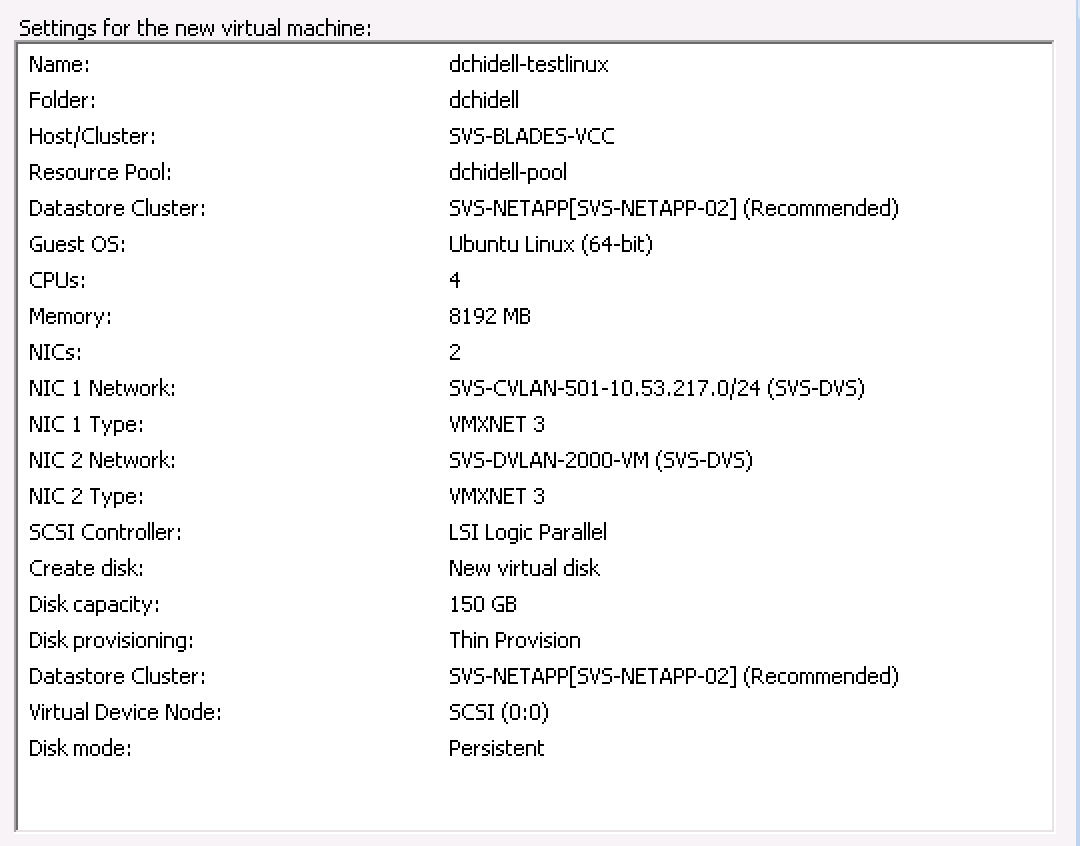
First, create a VM within ESXi to the specification required. Ubuntu server will run on very little resources, but I've got plenty at my disposal so I'm going to use the following:
- 4vCPU (2 sockets, 2 cores per socket)
- 8GB RAM
- 150GB Disk (Thin provisioned - of course)
The settings I used are below:
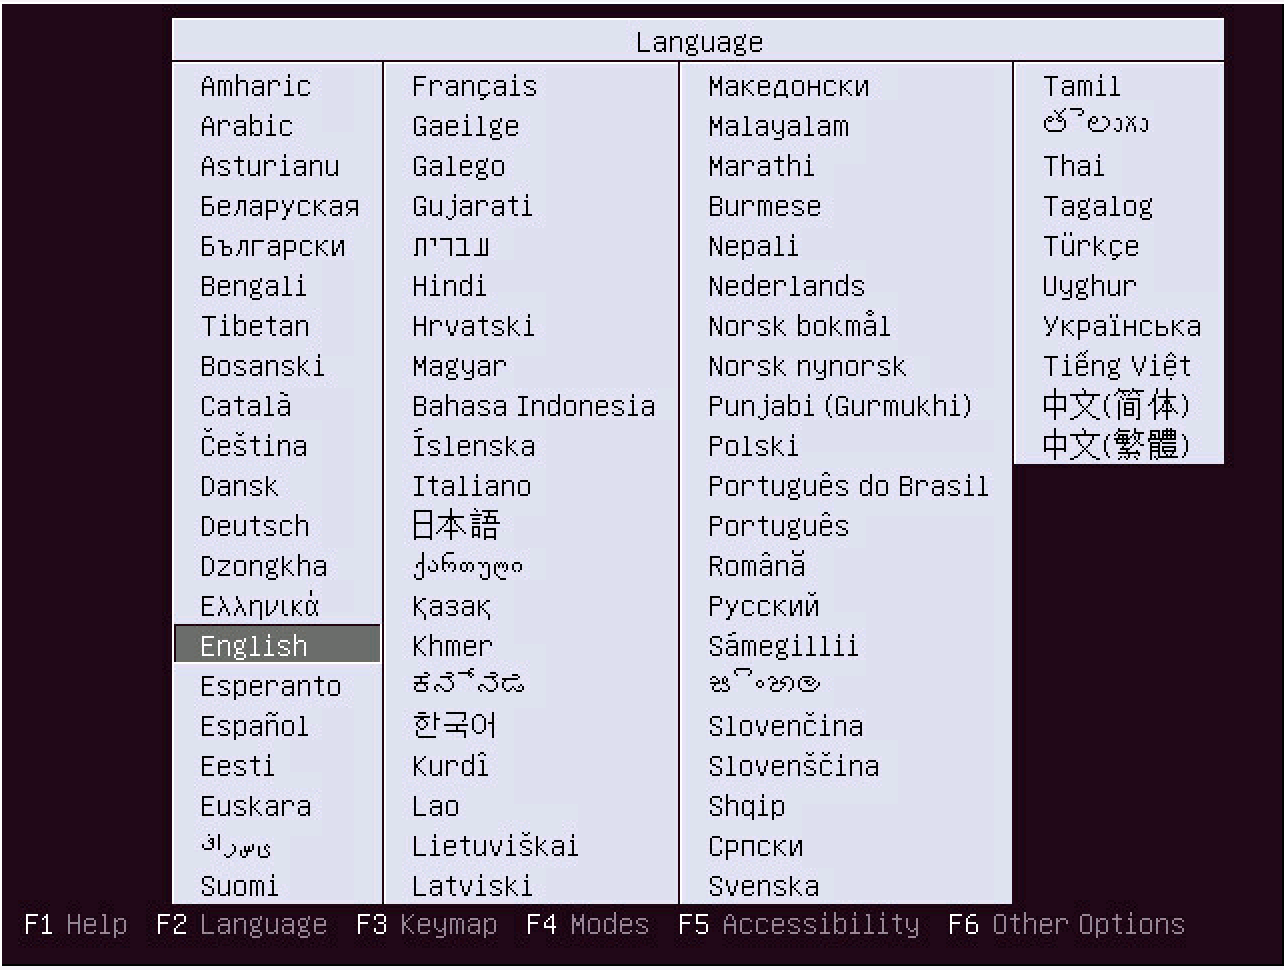
Now go ahead and attach the ISO to the VM and boot it up, you should be greeted with the following on the console:
Installation:
Most of the installation options should be self explanatory, I will provide screenshots of each step and the options I selected or entered highlighted in BOLD
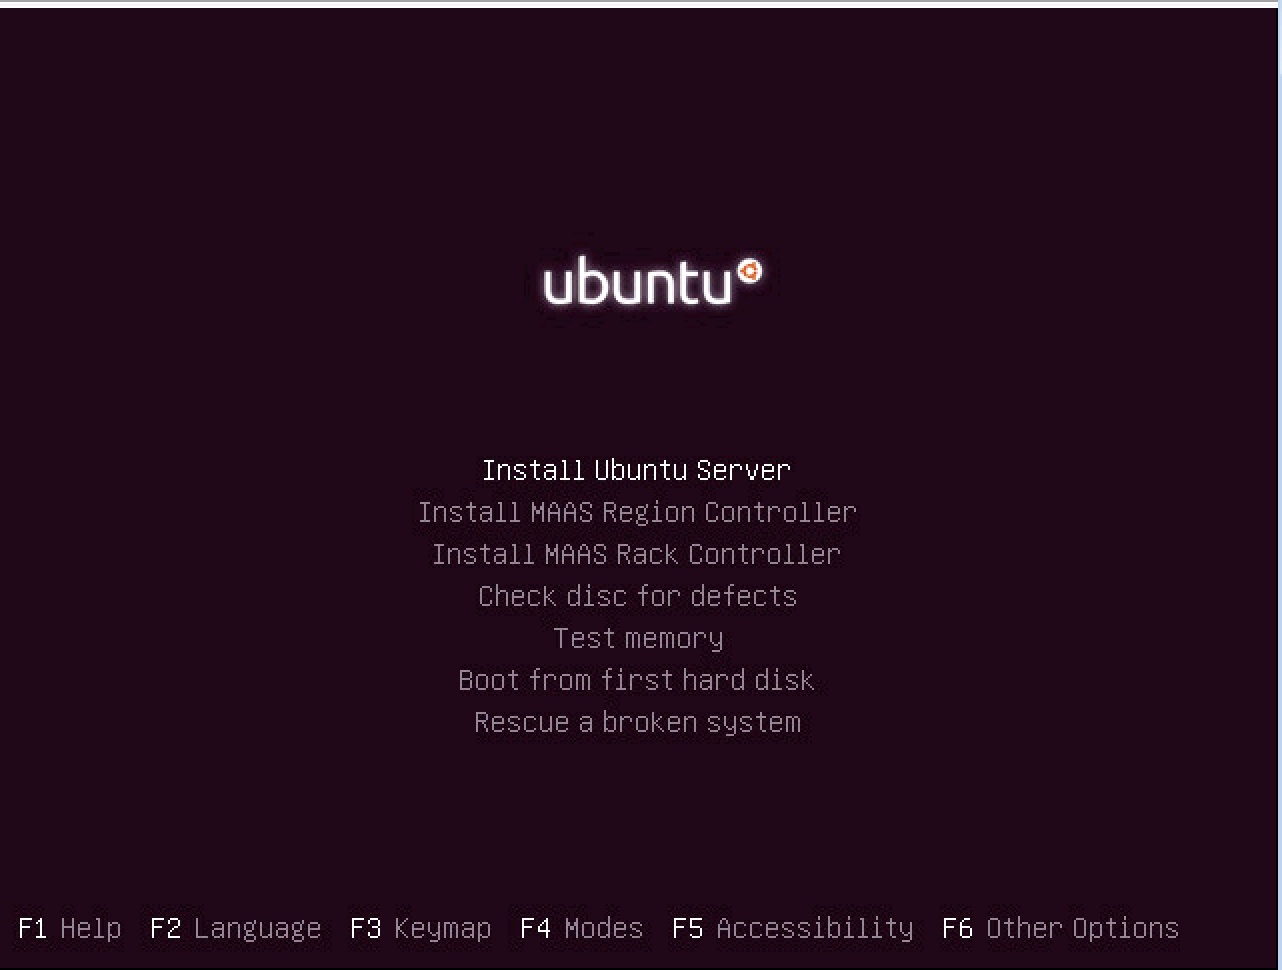
Pick the Install Ubuntu Server option. The screen may hang for a few seconds while the installer reads from the ISO file. Don't be tempted to hammer the enter key as you'll likely miss the next steps.
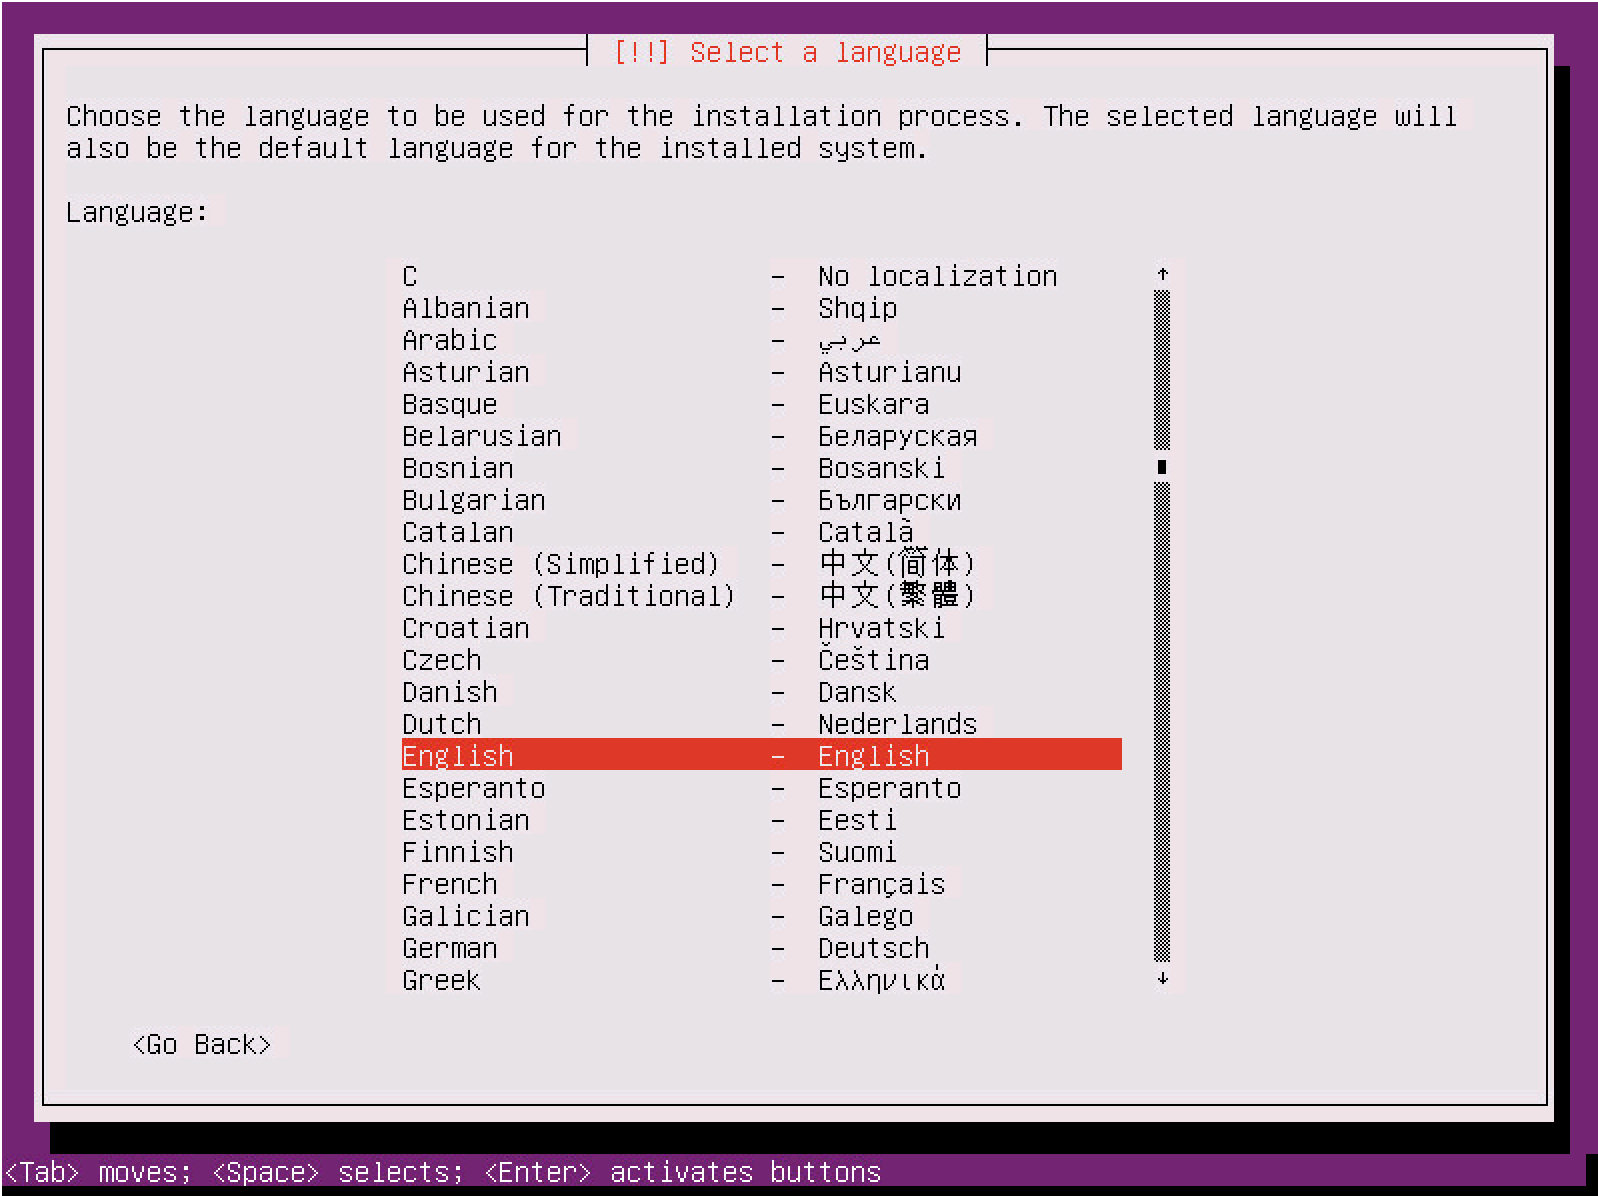
Pick the relevant language: English
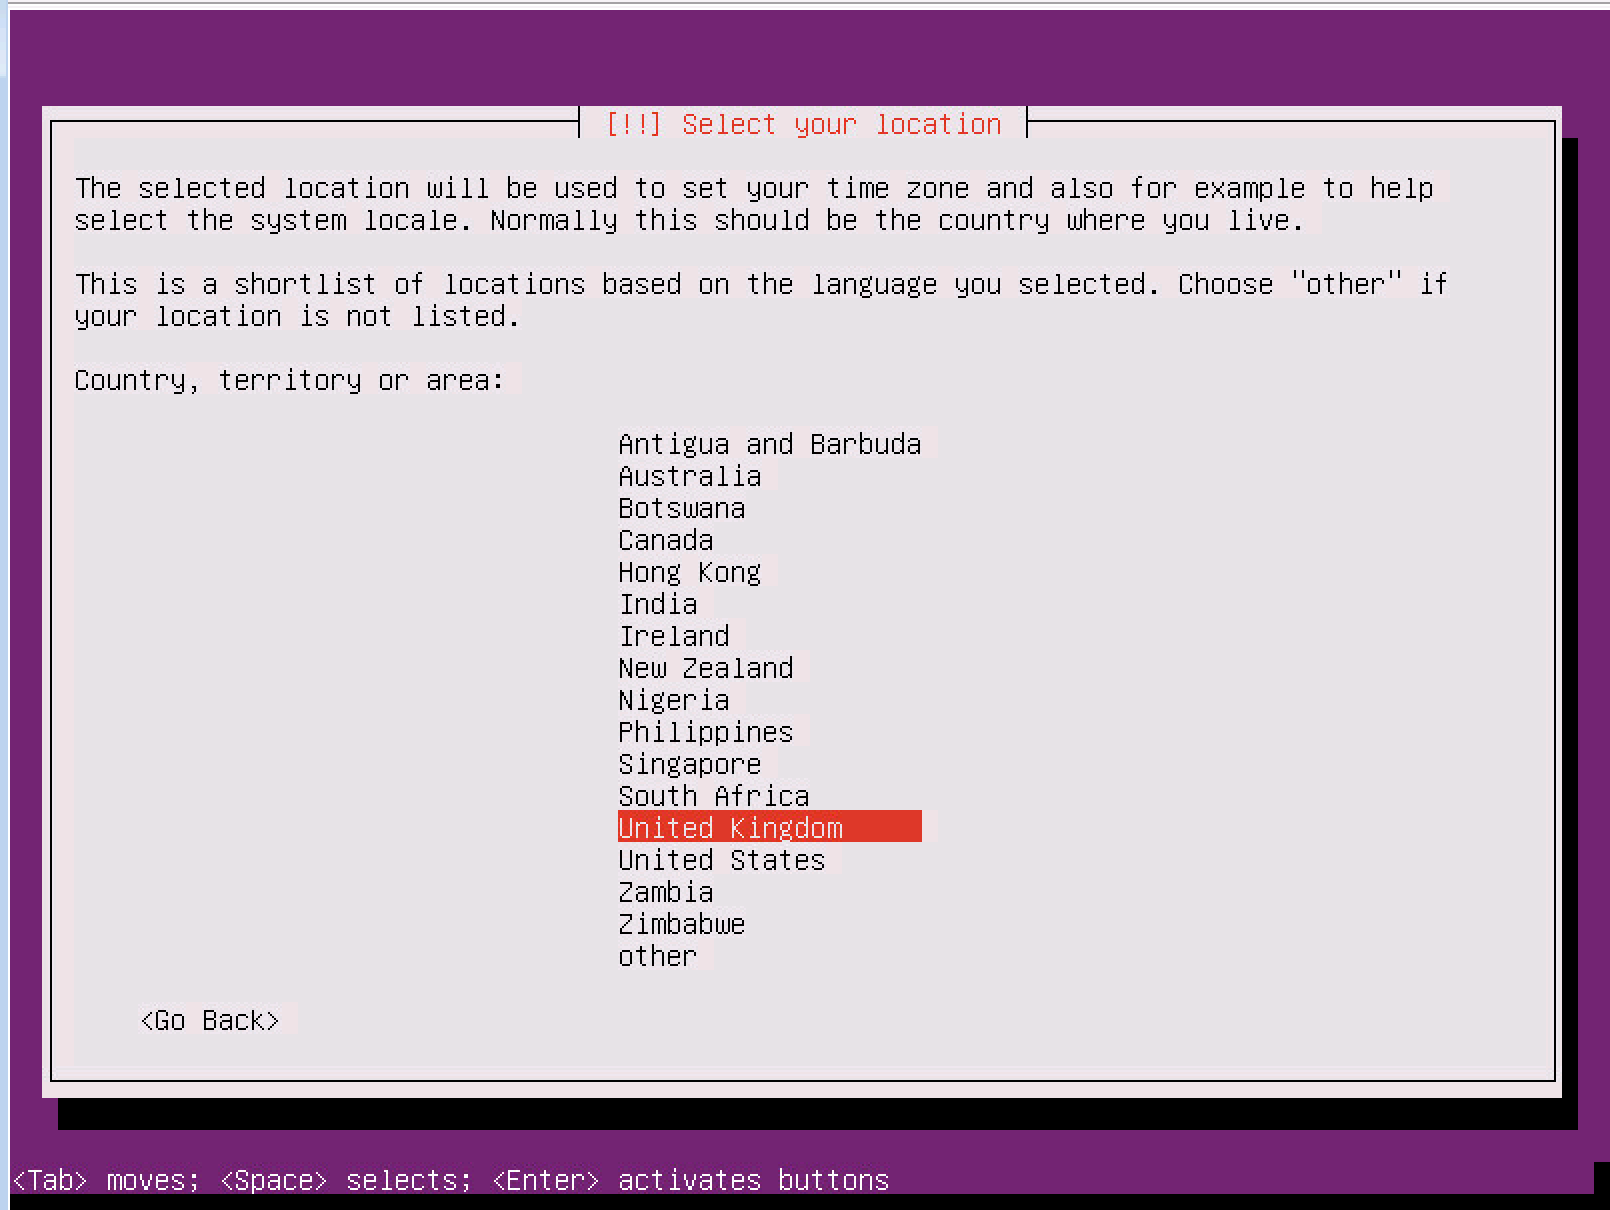
Pick the relevant country: United Kingdom
Select No for detecting keyboard layout - it's faster to specify it manually:

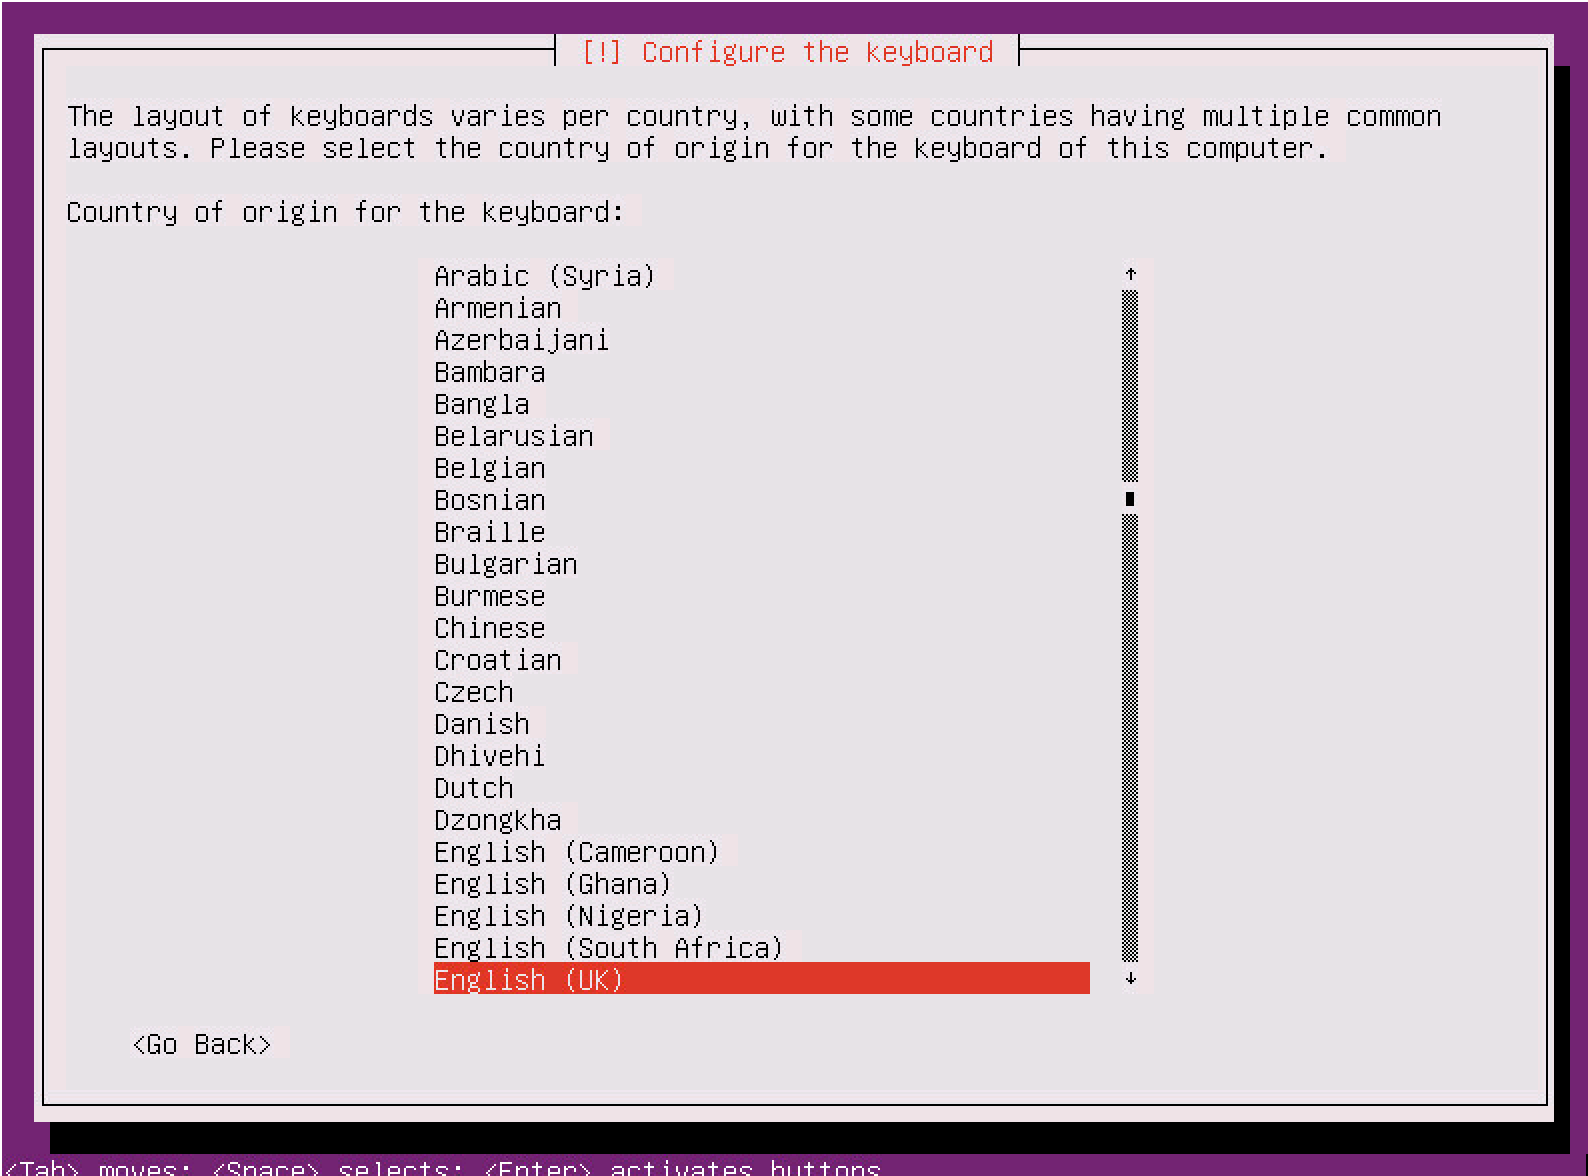
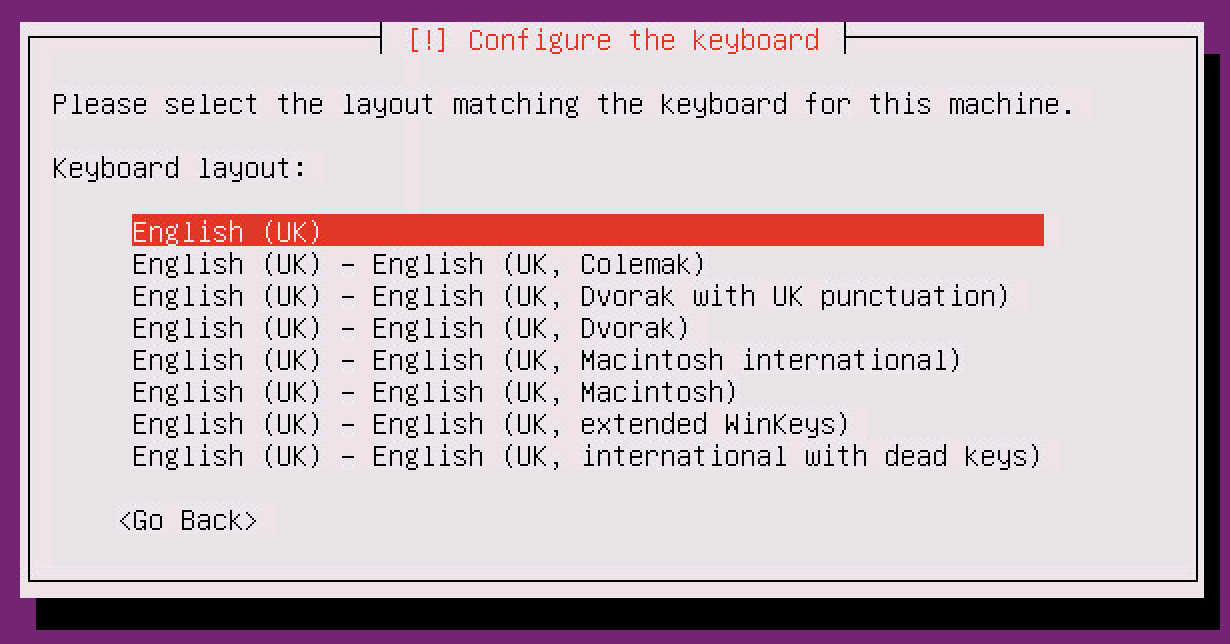
Select the keyboard layout (it picks the most likely for your country) English (UK):
Same again English (UK):
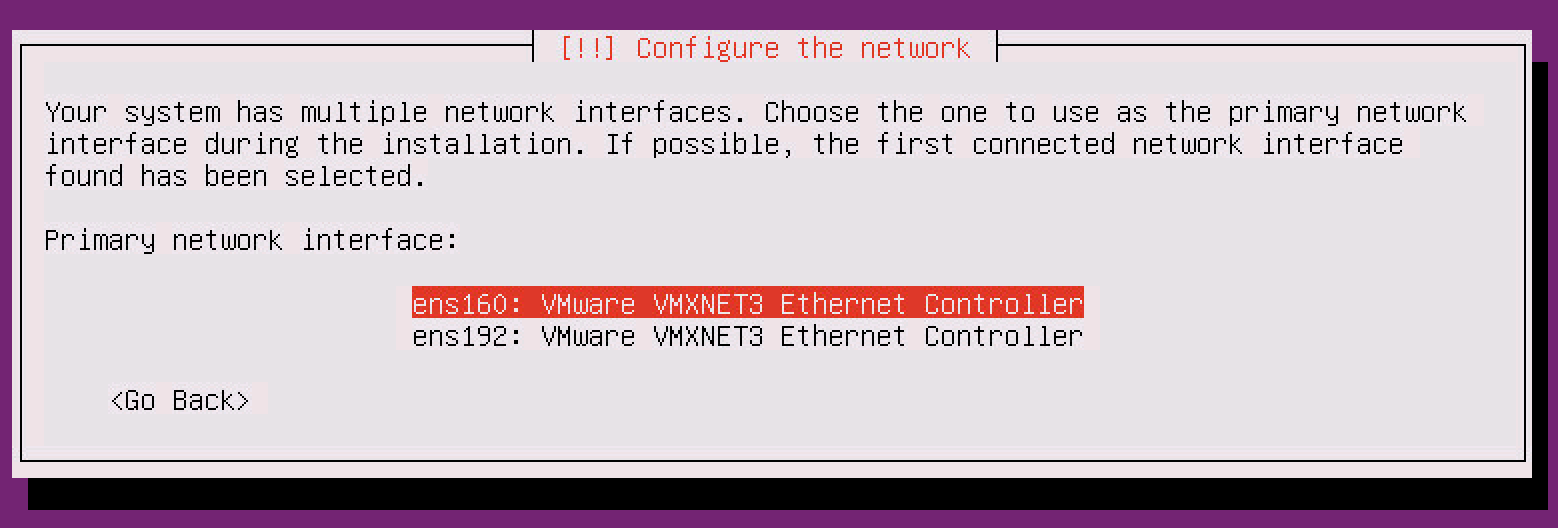
The installer will proceed to load components and go through some additional screens before presenting the following (if multiple NICs are in use). The first adapter in the list will be the first network you added within the vSphere client. If you're not sure, you can always edit the settings of the VM and check the order of the NICs. In my case, we want ens160
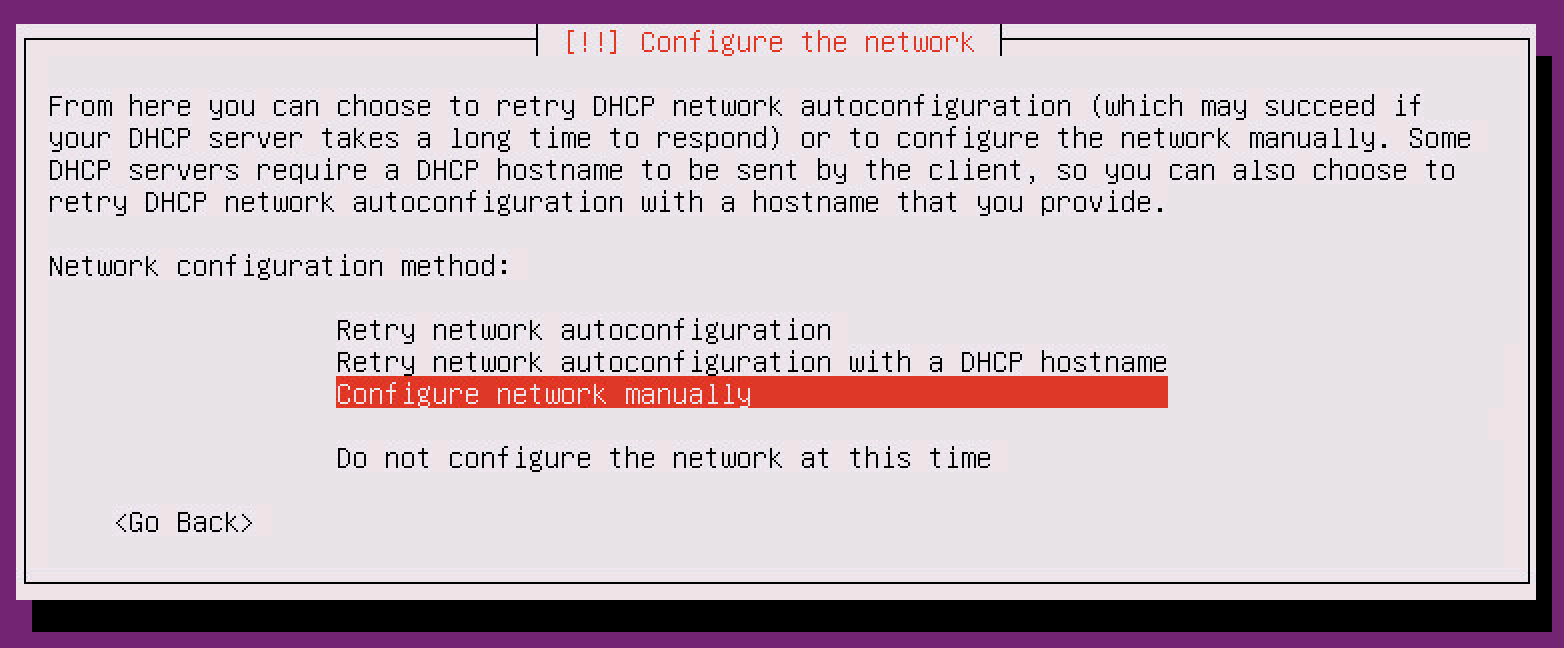
The NIC will attempt to automatically configure itself with IPv4 and IPv6 but since this is a server it's likely there is no DHCP server and therefore you'll get the following error message:

We want to configure the network manually, so select the Configure network manually option:
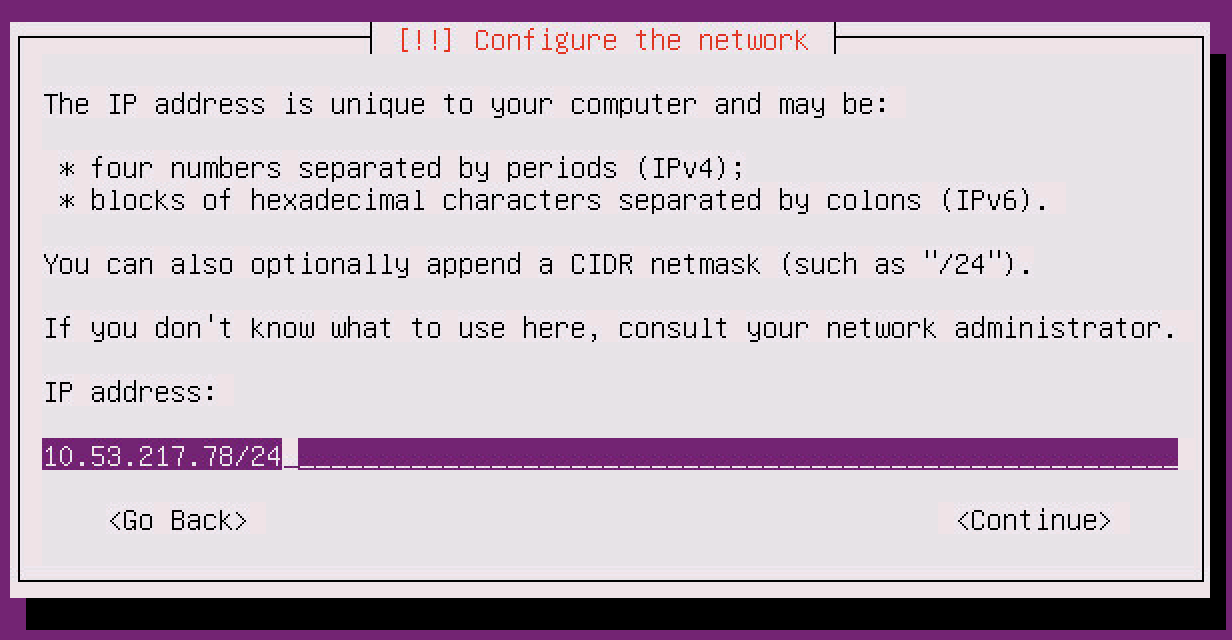
Enter the IP you're going to use and the subnet mask in CIDR form and then select Continue:
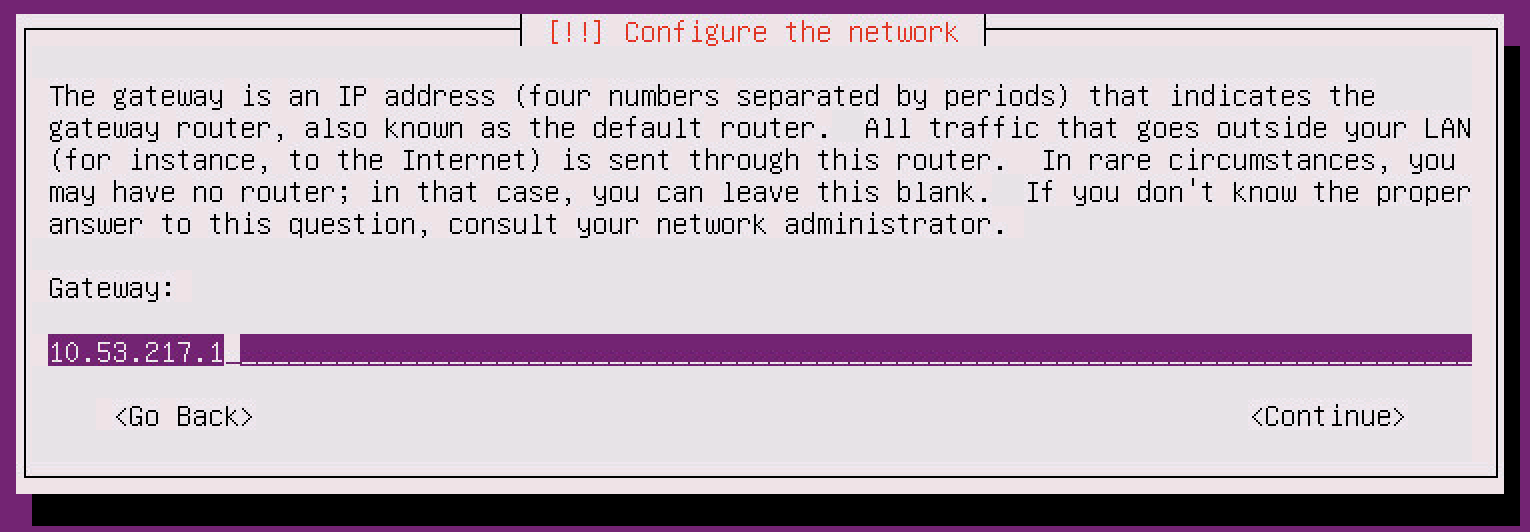
Enter the default gateway for the network (by default the first usage IP of the subnet will be present) and select Continue:
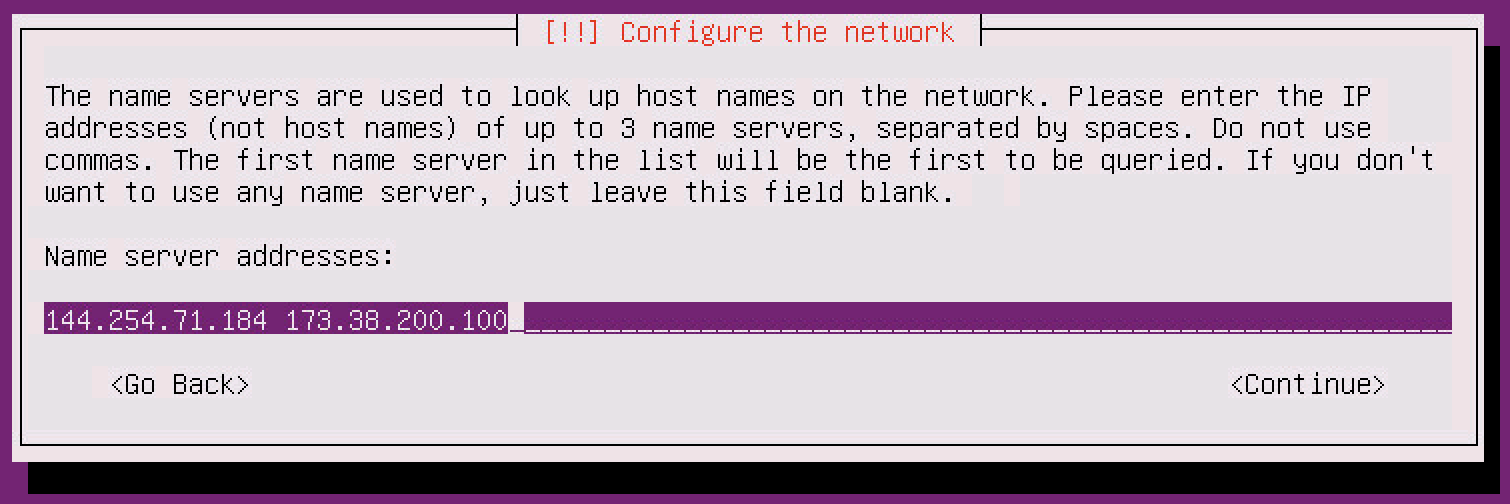
Enter the DNS servers you want to use (separated by spaces) and select Continue:
Time to pick a hostname for the system. Make it a good one! Select Continue:
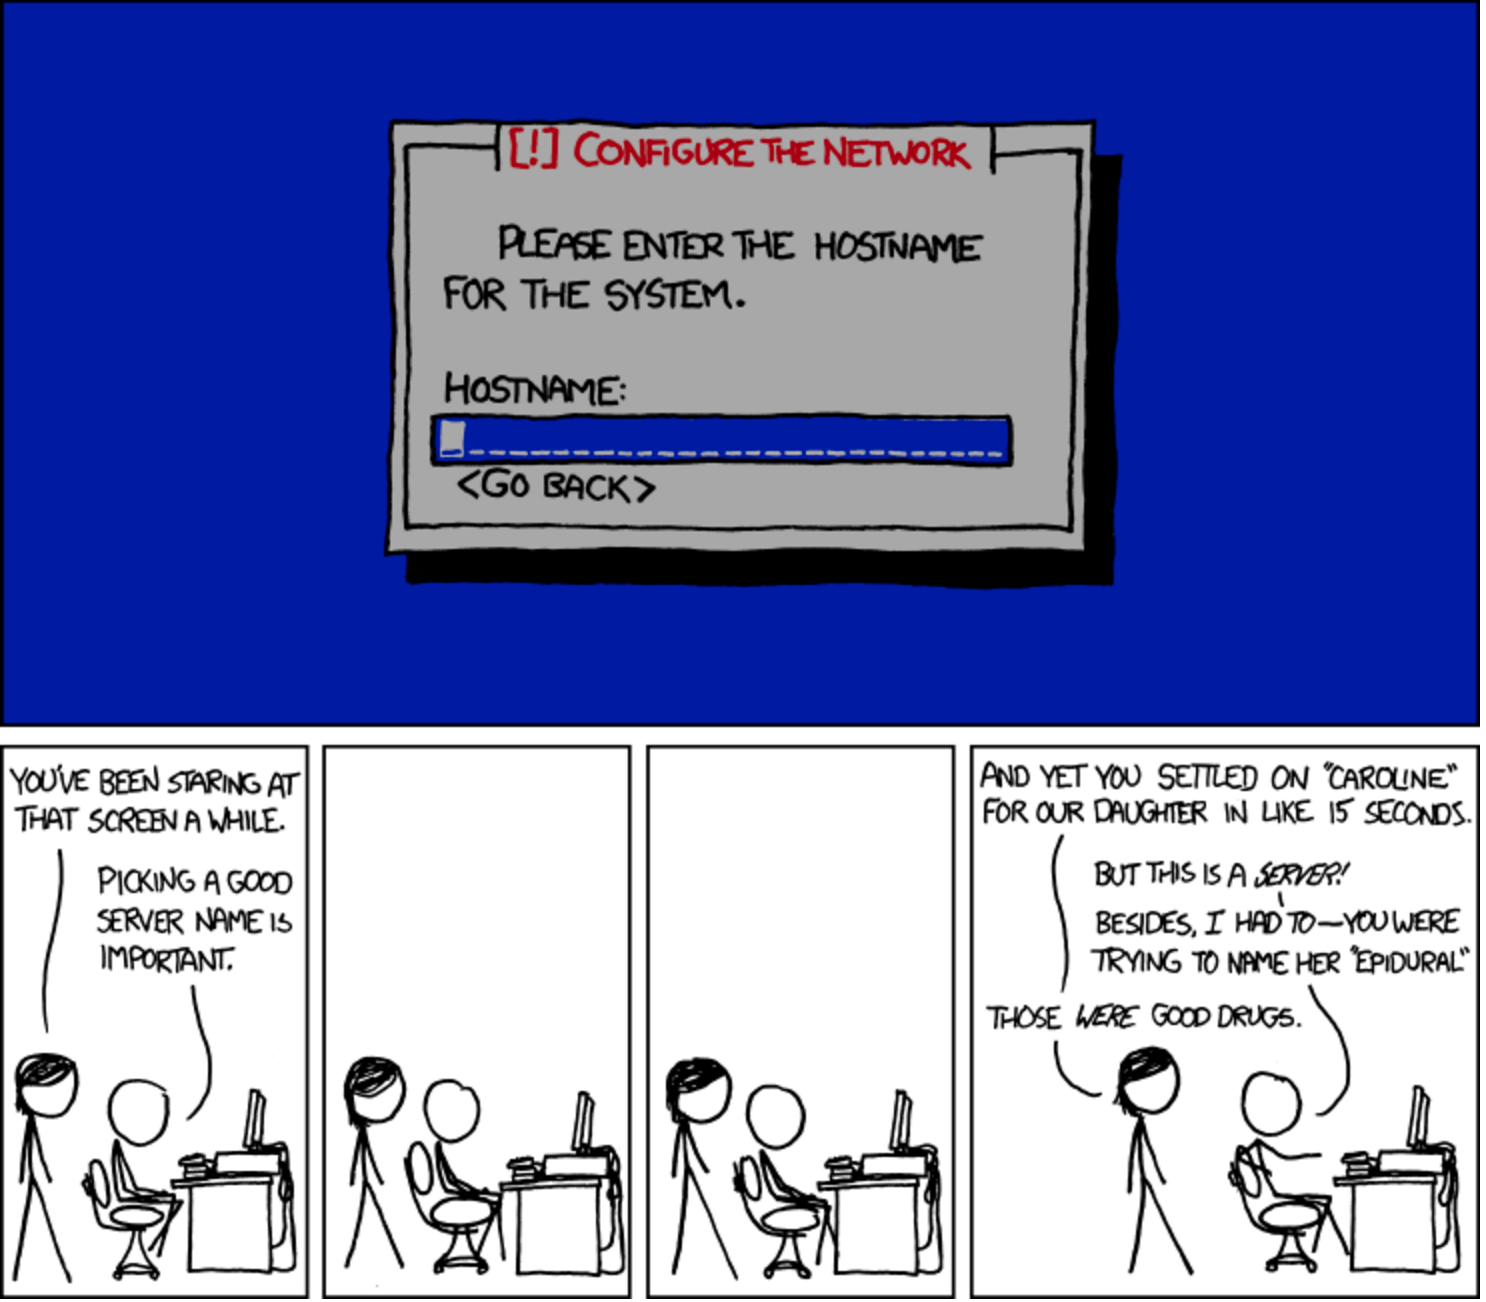
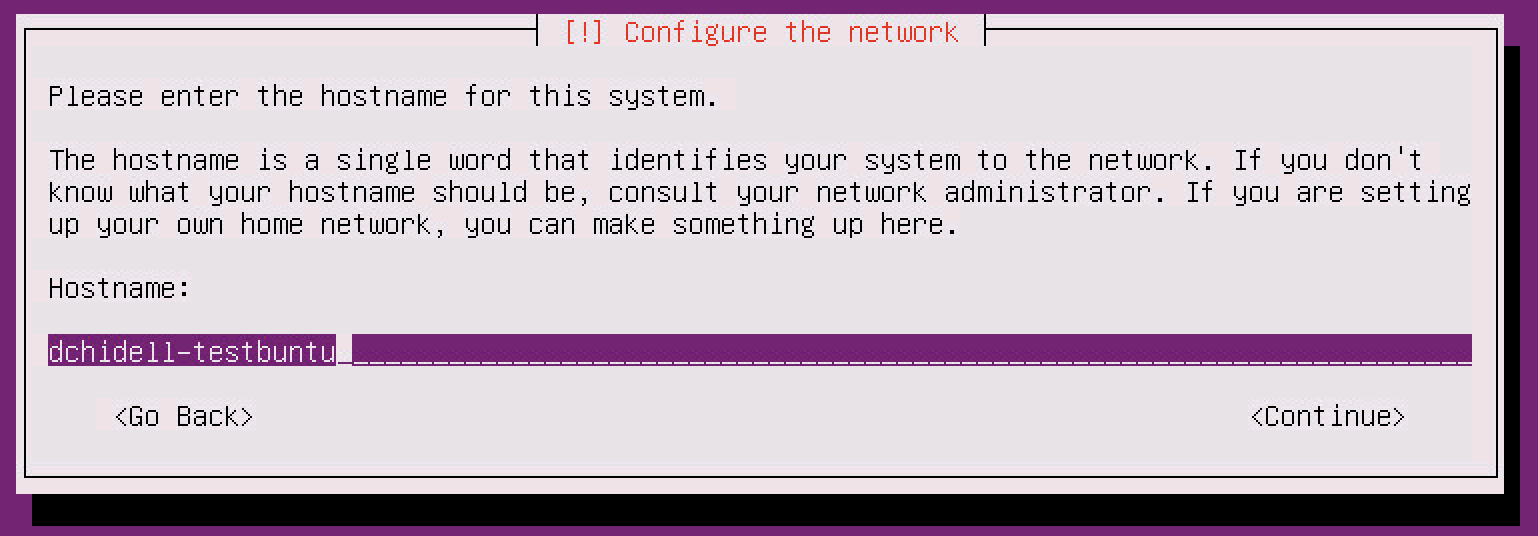
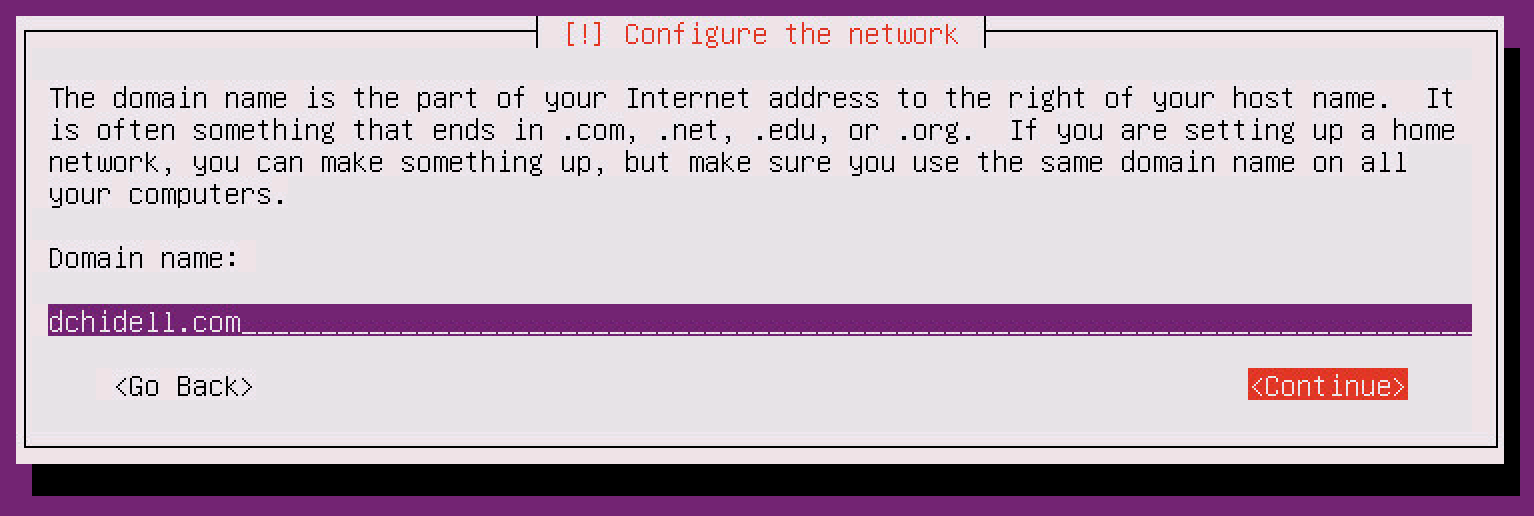
Enter a domain name, if you're in an organisation, best make it match where you are:
Initial username, this screen is where you set the Full Name and NOT the username:
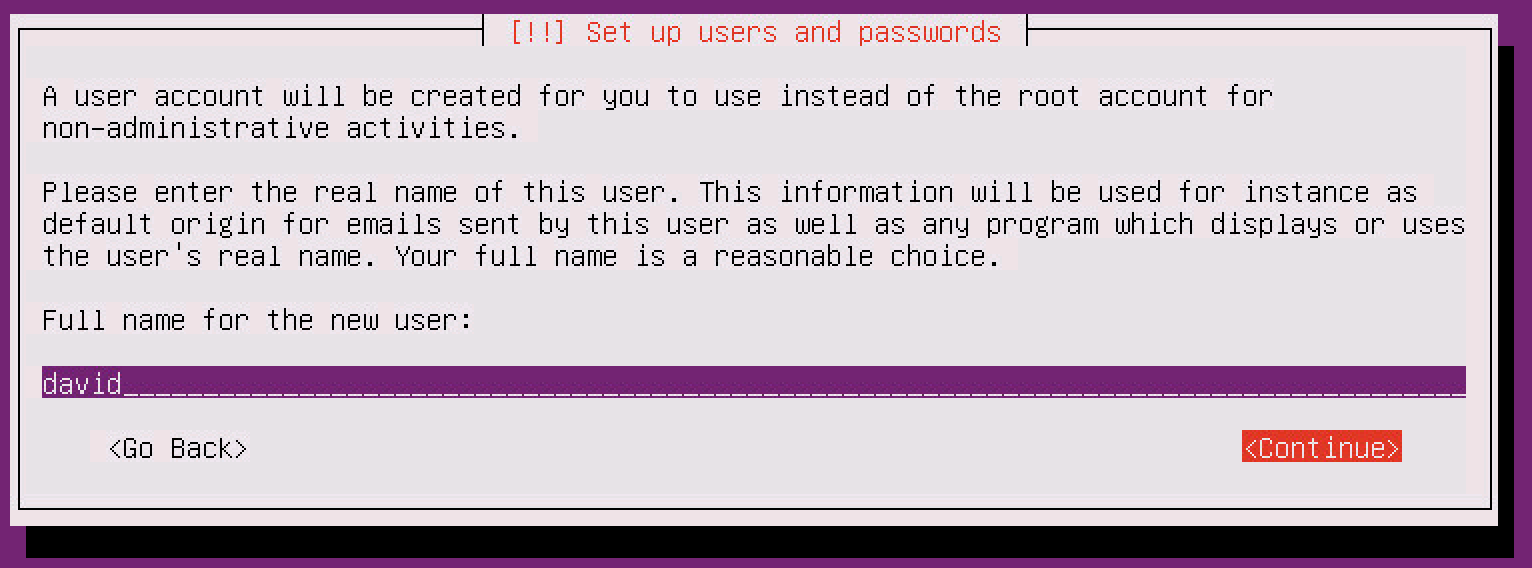
Now we set the username, but I'm using the same for both:

Pick a password for the new user:

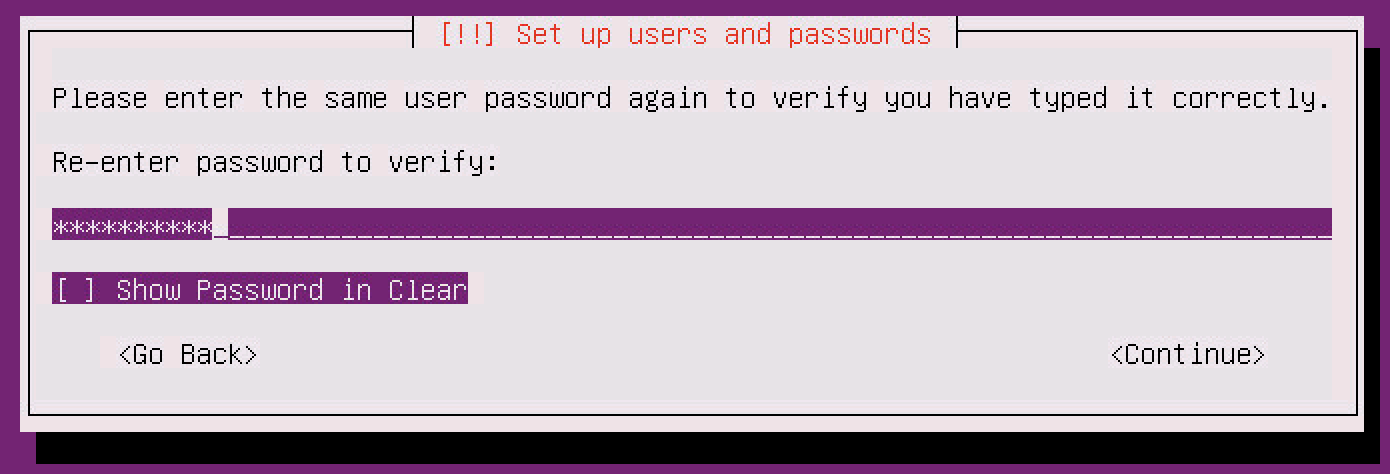
Verify the password (When you have to screenshot all these steps there are so many more than you remember):
Since this is a test system, I would not encrypt my home directory, just in case choose No:

The system will attempt to pull the time information, it doesn't always get it right. Mine for instance, is wrong, so choose No:

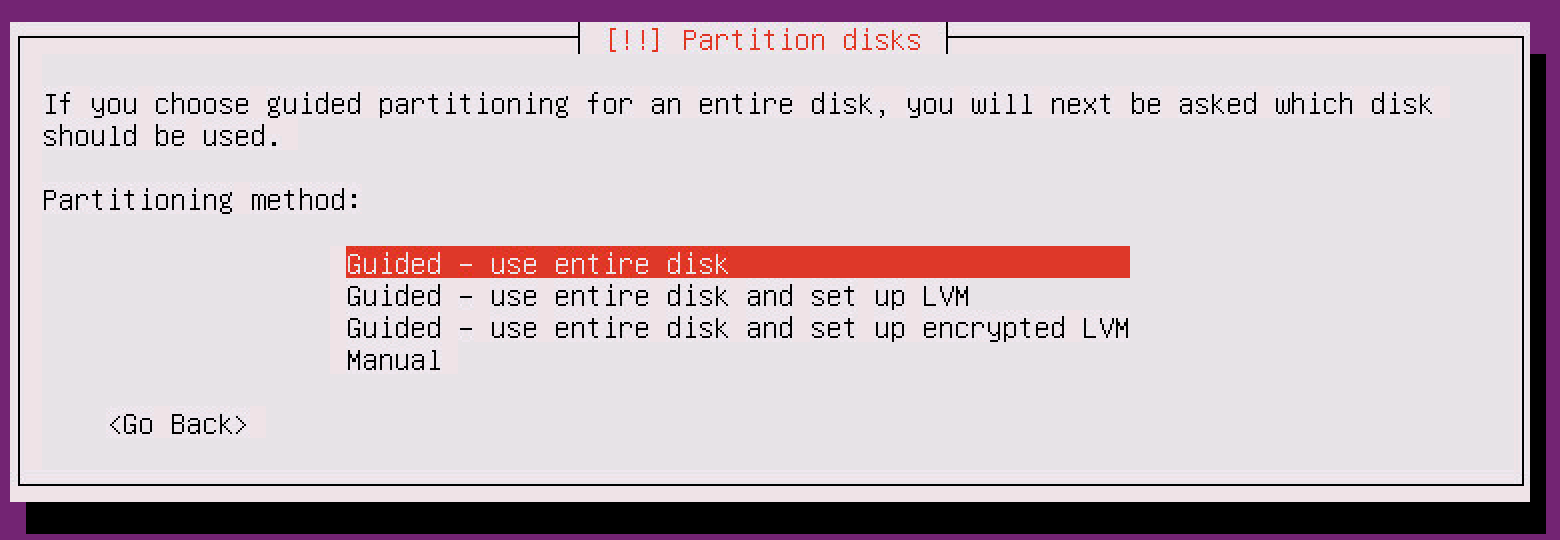
Next is the disk partitioning. The easiest option here (and the one we're going to use) is Guided - use entire disk. This will use the entire 150GB hard disk we selected and uses the default linux partitions. LVM stands for Logical Volume Management and changes the way partitions are mounted within your VM. You can do your own research on LVM and decide if you want it or not. There are advantages like resizing partitions on the fly without needing them to unmounted but since this is a test system it doesn't matter much. I've also had issues in the past when using LVM on VMware which really put me off using it.
Select the disk you wish to use, in my case I only have one, so let's use it:

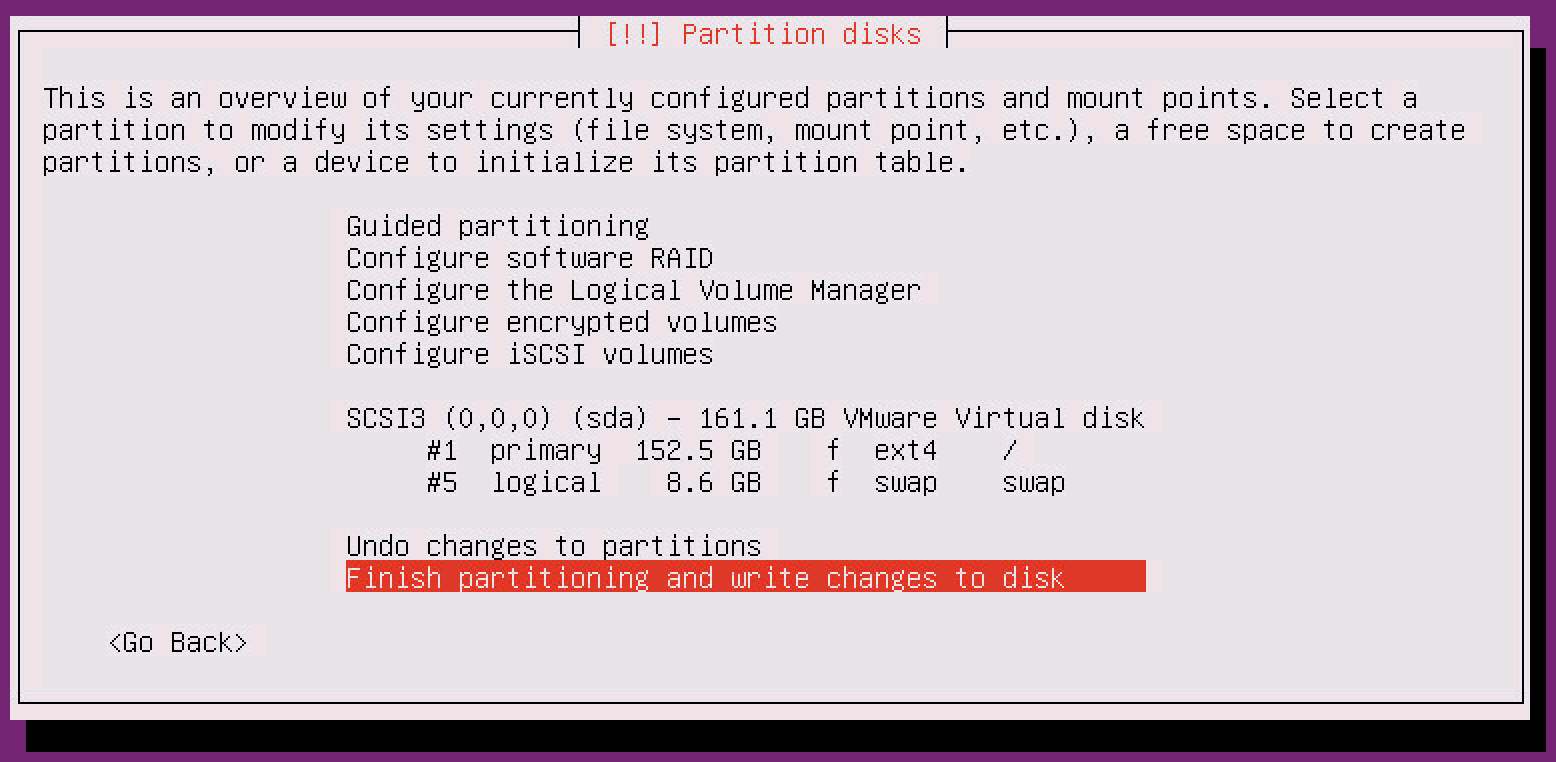
The disk partitioner will then be ready to write the changes to the disks, so go ahead and confirm your choices Finish partitioning and write changes to disk
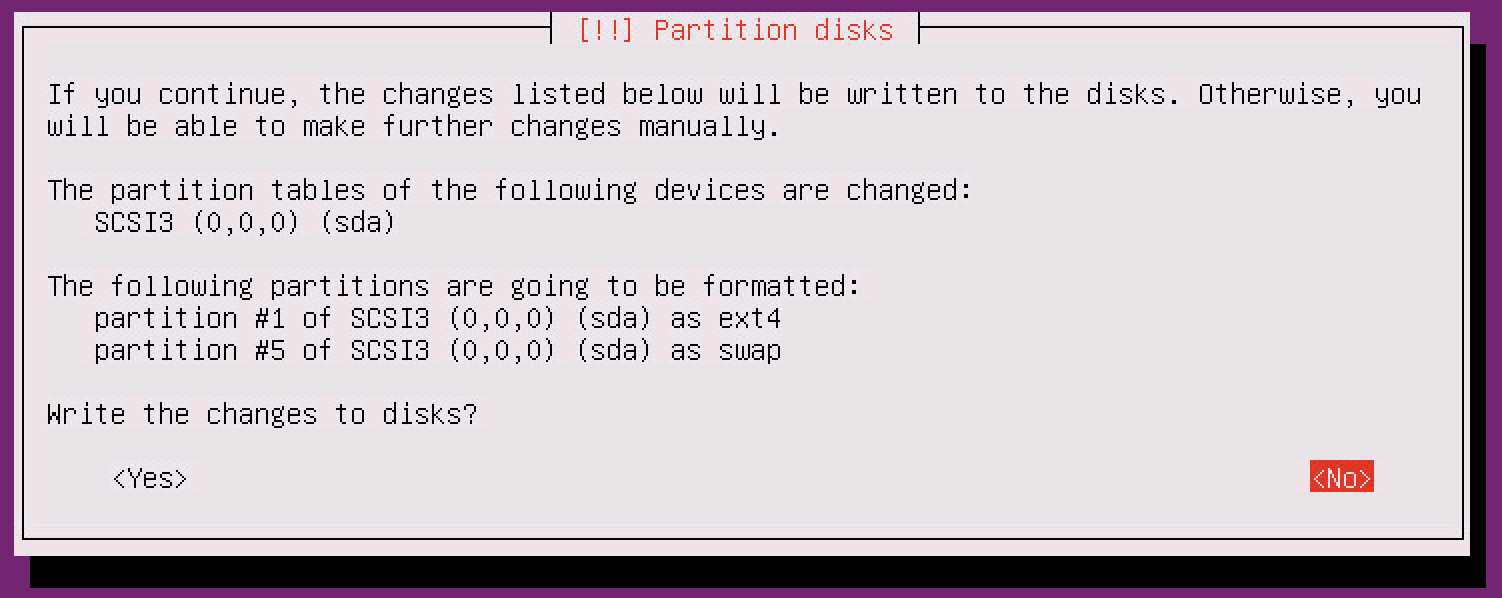
We're just one more confirmation away from creating the disk, make sure to select Yes here, by default the installer will select No!
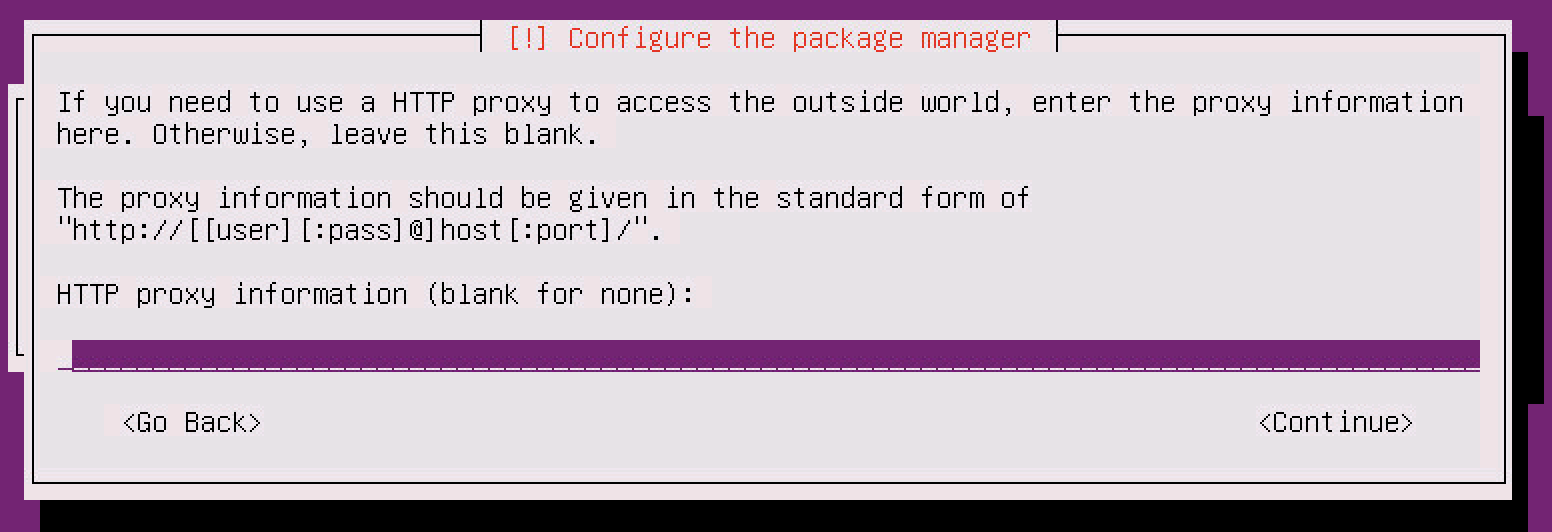
Now the installer will ask for a proxy address. We can configure this now, or later manually. Given it sometimes changes, let's configure it later and leave it blank for now, select Continue:
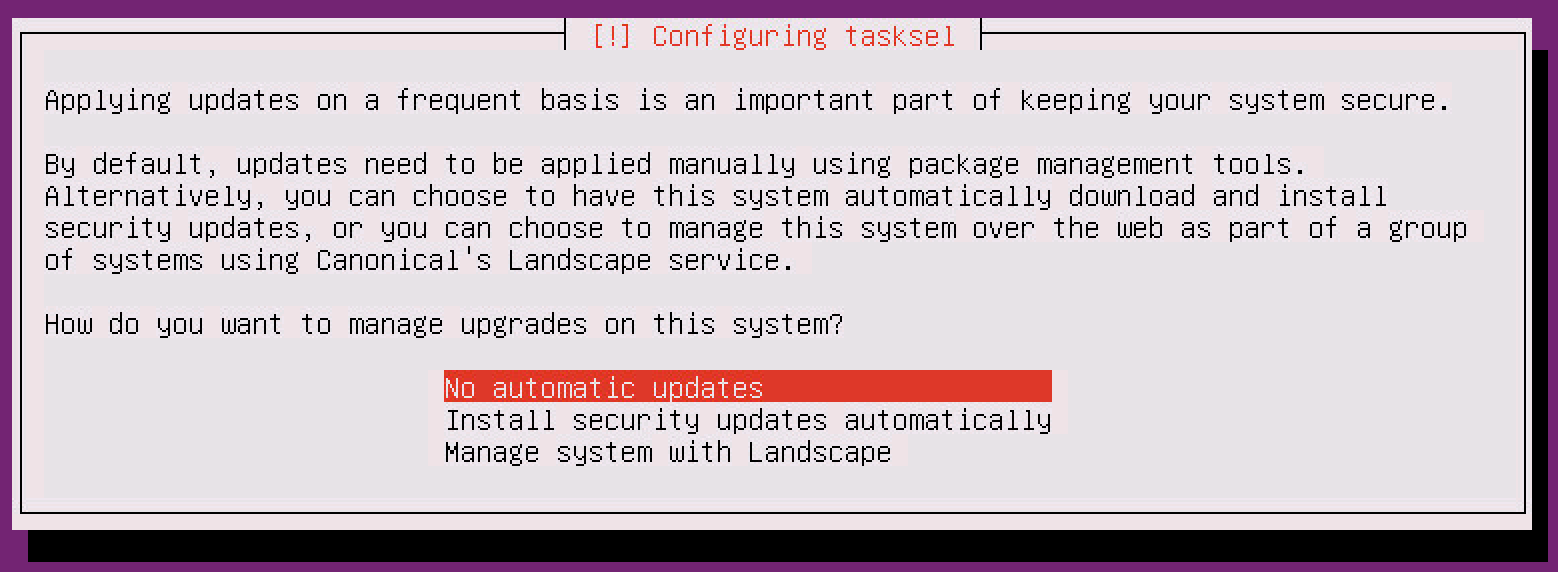
Nobody likes automatic updates No automatic updates:
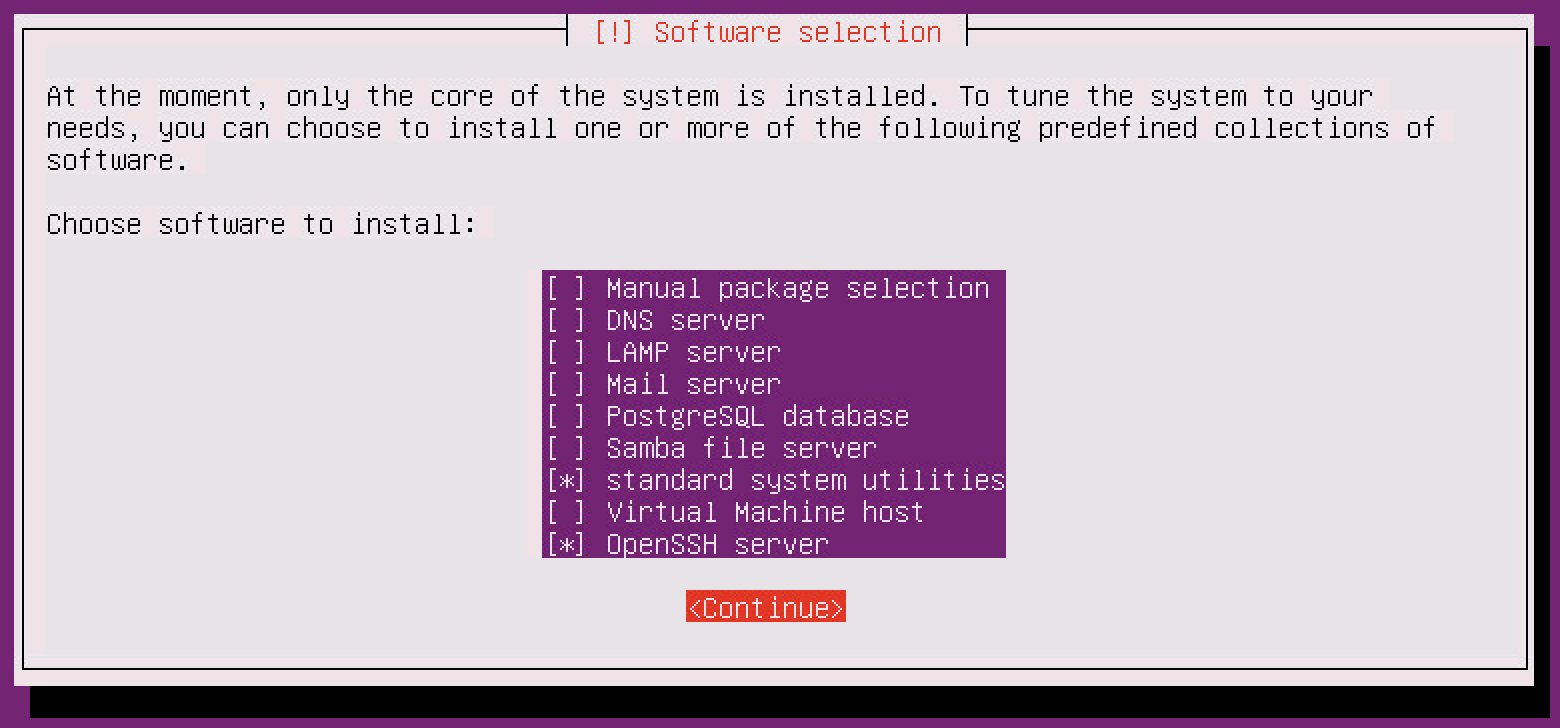
Package selection, this stage is important! The SPACE key lets you select options from the menu. If you blast away with the enter key you'll just proceed with the installation. Scroll to OpenSSH server and select it, then Continue if you don't do this, you'll have to use the VMware console to get into the VM, and it's bad enough using it for installation:
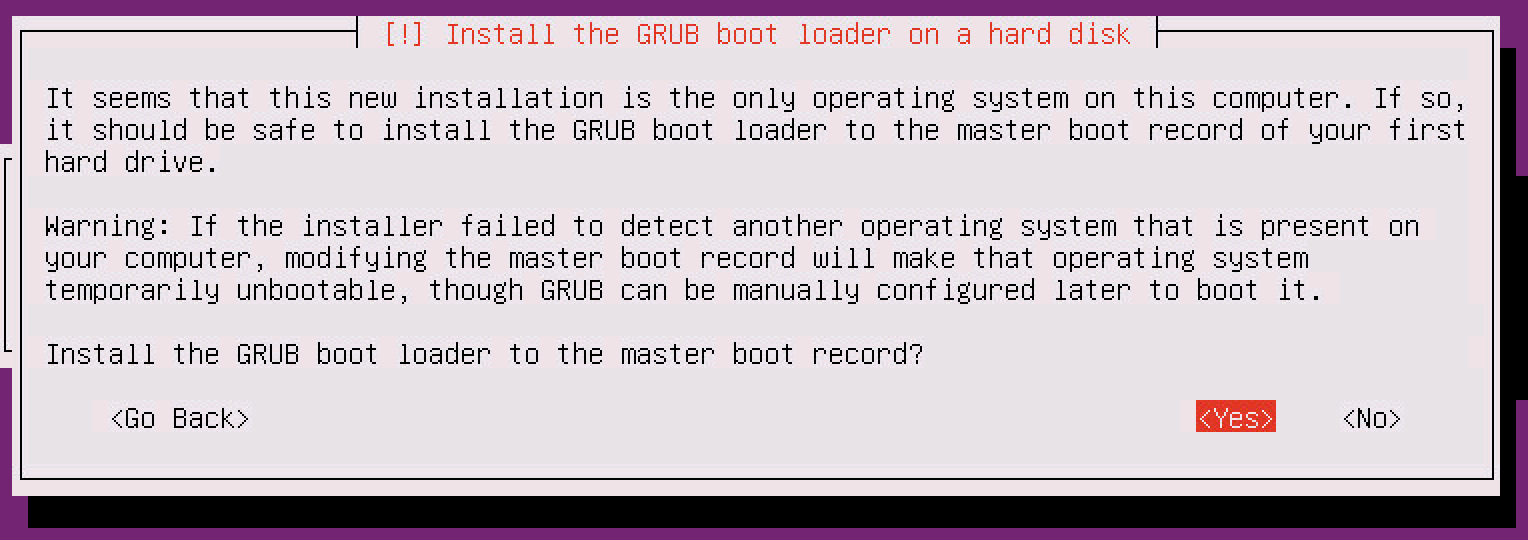
The installer will proceed configuring and installing the system until it reaches the following screen. This will install the bootloader into the hard drive, which is what you want if you want to actually boot your server! Pick Yes
Installation is finished! Remove the ISO from VMware and select Continue:

Configuration
Following installation the server will reboot (should be pretty snappy) and a login prompt should be visible from the VMware console:

We could log in here with the username and password we configured earlier. But considering we also configured the networking on ens160 and installed the OpenSSH package we should be able to SSH to the box using your favourite SSH client!
dchidell@dchidell-mac:~$
dchidell@dchidell-mac:~$ ssh [email protected]
Warning: Permanently added '10.53.217.78' (ECDSA) to the list of known hosts.
[email protected]'s password:
Welcome to Ubuntu 16.04.1 LTS (GNU/Linux 4.4.0-31-generic x86_64)

 * Documentation:  https://help.ubuntu.com
 * Management:     https://landscape.canonical.com
 * Support:        https://ubuntu.com/advantage

78 packages can be updated.
36 updates are security updates.


The programs included with the Ubuntu system are free software;
the exact distribution terms for each program are described in the
individual files in /usr/share/doc/*/copyright.

Ubuntu comes with ABSOLUTELY NO WARRANTY, to the extent permitted by
applicable law.

To run a command as administrator (user "root"), use "sudo <command>".
See "man sudo_root" for details.

david@dchidell-testbuntu:~$
david@dchidell-testbuntu:~$
david@dchidell-testbuntu:~$
Success!
We still have the following things to do:
- Install VMware tools
- Configure the second NIC & appropriate routing
- Configure a proxy server
- Update the system
VMware Tools:
Installing VMware tools used to be tricky, however these days it's rather straight forward. In fact, ubuntu server 16.04 actually comes pre-installed with VMware tools! So already, without doing anything, you should be able to see VMware tools running from VMware:
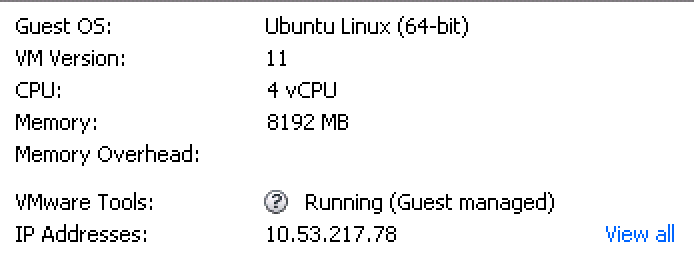
If you've not got VMware tools, (lets say you're using a different ubuntu version) your best bet is to use the following:
apt-get install open-vm-tools
This will download and install the VMware tools package from the ubuntu repository.
NIC & routing configuration:
This server sits in an environment where it can talk to two disjointed networks which are separate for security reasons. One NIC reaches out to the internet and thus uses a default gateway. This was the ens160 NIC we configured during installation. The other NIC has a few networks running behind it but that's all.
Using your SSH client edit the /etc/network/interfaces file. Currently you'll notice the following:
david@dchidell-testbuntu:~$
david@dchidell-testbuntu:~$ sudo su
[sudo] password for david:
root@dchidell-testbuntu:/home/david#
root@dchidell-testbuntu:/home/david#
root@dchidell-testbuntu:/home/david#
root@dchidell-testbuntu:/home/david# cat /etc/network/interfaces
# This file describes the network interfaces available on your system
# and how to activate them. For more information, see interfaces(5).

source /etc/network/interfaces.d/*

# The loopback network interface
auto lo
iface lo inet loopback

# The primary network interface
auto ens160
iface ens160 inet static
	address 10.53.217.78
	netmask 255.255.255.0
	network 10.53.217.0
	broadcast 10.53.217.255
	gateway 10.53.217.1
	# dns-* options are implemented by the resolvconf package, if installed
	dns-nameservers 144.254.71.184
	dns-search dchidell.com
root@dchidell-testbuntu:/home/david#
root@dchidell-testbuntu:/home/david#
The ens160 configuration is present, but we also had another adapter which you can't see there. You can use ifconfig -a to view all of the network adapters in the system:
root@dchidell-testbuntu:/home/david# ifconfig -a
ens160    Link encap:Ethernet  HWaddr 00:50:56:a9:46:a7
          inet addr:10.53.217.78  Bcast:10.53.217.255  Mask:255.255.255.0
          inet6 addr: fe80::250:56ff:fea9:46a7/64 Scope:Link
          UP BROADCAST RUNNING MULTICAST  MTU:1500  Metric:1
          RX packets:1222 errors:0 dropped:0 overruns:0 frame:0
          TX packets:763 errors:0 dropped:0 overruns:0 carrier:0
          collisions:0 txqueuelen:1000
          RX bytes:102574 (102.5 KB)  TX bytes:64230 (64.2 KB)

ens192    Link encap:Ethernet  HWaddr 00:50:56:a9:5f:7b
          BROADCAST MULTICAST  MTU:1500  Metric:1
          RX packets:0 errors:0 dropped:0 overruns:0 frame:0
          TX packets:0 errors:0 dropped:0 overruns:0 carrier:0
          collisions:0 txqueuelen:1000
          RX bytes:0 (0.0 B)  TX bytes:0 (0.0 B)

lo        Link encap:Local Loopback
          inet addr:127.0.0.1  Mask:255.0.0.0
          inet6 addr: ::1/128 Scope:Host
          UP LOOPBACK RUNNING  MTU:65536  Metric:1
          RX packets:160 errors:0 dropped:0 overruns:0 frame:0
          TX packets:160 errors:0 dropped:0 overruns:0 carrier:0
          collisions:0 txqueuelen:1
          RX bytes:11840 (11.8 KB)  TX bytes:11840 (11.8 KB)

root@dchidell-testbuntu:/home/david#
As we can see, the second NIC is ens192
We'll have the replicate the configuration of ens160 and change a few things to get ens192 to work. This is what I added to the /etc/network/interfaces file:
auto ens192
        iface ens192 inet static
        address 1.0.217.78
        netmask 255.255.0.0
        network 1.0.0.0
        broadcast 1.0.255.255
So this will give our ens192 interface some basic configuration, following an interface reset it will be able to communicate with the 1.0.0.0/16 network! However, I've got a few other networks sitting behind this, so we have to add routes to these. We can do that by adding a bit more configuration to the /etc/network/interfaces file:
auto ens192
        iface ens192 inet static
        address 1.0.217.78
        netmask 255.255.0.0
        network 1.0.0.0
        broadcast 1.0.255.255
	up route add -net 1.0.0.0/8 gw 1.0.0.254 dev eth192
	up route add -net 2.0.0.0/8 gw 1.0.0.254 dev eth192
	up route add -net 3.0.0.0/8 gw 1.0.0.254 dev eth192
	up route add -net 4.0.0.0/8 gw 1.0.0.254 dev eth192
You can add as many routes as you like, but these are the ones I am using to reach my remote subnets.
After you've finished editing the file, run the following command to restart the networking services:
sudo systemctl restart networking
We can now use ifconfig again to see that our network adapter is up:
root@dchidell-testbuntu:/home/david# ifconfig
ens160    Link encap:Ethernet  HWaddr 00:50:56:a9:46:a7
          inet addr:10.53.217.78  Bcast:10.53.217.255  Mask:255.255.255.0
          inet6 addr: fe80::250:56ff:fea9:46a7/64 Scope:Link
          UP BROADCAST RUNNING MULTICAST  MTU:1500  Metric:1
          RX packets:3579 errors:0 dropped:0 overruns:0 frame:0
          TX packets:2212 errors:0 dropped:0 overruns:0 carrier:0
          collisions:0 txqueuelen:1000
          RX bytes:271011 (271.0 KB)  TX bytes:168691 (168.6 KB)

ens192    Link encap:Ethernet  HWaddr 00:50:56:a9:5f:7b
          inet addr:1.0.217.78  Bcast:1.0.255.255  Mask:255.255.0.0
          inet6 addr: fe80::250:56ff:fea9:5f7b/64 Scope:Link
          UP BROADCAST RUNNING MULTICAST  MTU:1500  Metric:1
          RX packets:2044 errors:0 dropped:0 overruns:0 frame:0
          TX packets:8 errors:0 dropped:0 overruns:0 carrier:0
          collisions:0 txqueuelen:1000
          RX bytes:204472 (204.4 KB)  TX bytes:648 (648.0 B)

lo        Link encap:Local Loopback
          inet addr:127.0.0.1  Mask:255.0.0.0
          inet6 addr: ::1/128 Scope:Host
          UP LOOPBACK RUNNING  MTU:65536  Metric:1
          RX packets:160 errors:0 dropped:0 overruns:0 frame:0
          TX packets:160 errors:0 dropped:0 overruns:0 carrier:0
          collisions:0 txqueuelen:1
          RX bytes:11840 (11.8 KB)  TX bytes:11840 (11.8 KB)

root@dchidell-testbuntu:/home/david#
Note we can also ping a remote subnet:
root@dchidell-testbuntu:/home/david# ping 2.1.0.254
PING 2.1.0.254 (2.1.0.254) 56(84) bytes of data.
64 bytes from 2.1.0.254: icmp_seq=1 ttl=255 time=3.04 ms
64 bytes from 2.1.0.254: icmp_seq=2 ttl=255 time=0.425 ms
^C
--- 2.1.0.254 ping statistics ---
2 packets transmitted, 2 received, 0% packet loss, time 1001ms
rtt min/avg/max/mdev = 0.425/1.732/3.040/1.308 ms
root@dchidell-testbuntu:/home/david#
Proxy Server
These are always fun. In my position I need a proxy to get to the internet and download packages. To add a system proxy temporarily (for commands like wget) we can add an environment variable like the following:
export http_proxy="http://proxy.example.com:80/"
export https_proxy="https://proxy.example.com:8080/"
However for things like apt-get we can specifically configure the proxy server in the file /etc/apt/apt.conf (You may need to create it as it does not exist by default).
Put the following in the file:
Acquire::http::proxy "http://proxy.example.com:80/";
Acquire::https::proxy "https://proxy.example.com:8080/";
After this we should be able to update our repos with apt-get update
root@dchidell-testbuntu:/home/david# apt-get update
Hit:1 http://gb.archive.ubuntu.com/ubuntu xenial InRelease
Get:2 http://security.ubuntu.com/ubuntu xenial-security InRelease [94.5 kB]
Get:3 http://gb.archive.ubuntu.com/ubuntu xenial-updates InRelease [95.7 kB]
Hit:4 http://gb.archive.ubuntu.com/ubuntu xenial-backports InRelease
Fetched 190 kB in 0s (485 kB/s)
Reading package lists... Done
root@dchidell-testbuntu:/home/david#
We can now install packages using the apt-get install command e.g.:
root@dchidell-testbuntu:/home/david# apt-get install default-jdk
Reading package lists... Done
Building dependency tree
Reading state information... Done
The following additional packages will be installed:
  <output omitted>
0 to upgrade, 122 to newly install, 0 to remove and 73 not to upgrade.
Need to get 66.0 MB of archives.
After this operation, 358 MB of additional disk space will be used.
Do you want to continue? [Y/n] y
Get:1 http://gb.archive.ubuntu.com/ubuntu xenial/main amd64 fonts-dejavu-core all 2.35-1 [1,039 kB]
<output omitted>
I would recommend performing the following commands periodically to keep your system packages up to date:
apt-get update
apt-get upgrade
apt-get dist-upgrade
- Update checks for package updates
- Upgrade upgrades packages
- dist-upgrade upgrades the kernel
We're done! Happy ubuntuing! Remember that google is your friend, if you find a problem it's pretty likely someone else has had it - there's plenty of information out there.