Working with Docker
Introduction:
I'm rather a keen advocate on Virtualisation technologies and anything that can be used to abstract resources into a pool to be used where needed.
As a result of this interest, I started looking into containerisation, specifically docker. Containerisation is an interesting concept for someone who has come from a VM background. The idea of sharing kernel space between instances of programs is an interesting concept but something quite alien to a VM oriented world.
Here are some arguments for and against the use of containers vs VMs.
Pro Containers:
- Less overhead required per application - no dedicated OS.
- Portability - You can package containers up very easily into tar archives and move them. While VMs are portable, the storage overhead reduces the portability somewhat.
- Separation of the 3 main data types: configuration, application binaries, application data - This is possible with VMs using different disks, NFS shares etc, but I've found that this is actually easier to accomplish using containers.
- Reduced deployment time - To deploy a new webserver in a container takes around 5 seconds! (Ok configuration takes some time, but configuration for a container vs VM is the same). Cloning an existing VM takes significantly longer, building one from scratch longer still.
Pro VMs:
- Higher level of separation - No dependency on guest OS at all
- Ability to run any OS, any application
- Deployable OVA templates are common for virtualised services (i.e. Cisco Virtual WLC)
- A more mature technology - HW optimisations have been made, more online resources available when troubleshooting
As a result of these factors I don't think containers replace VMs in all instances, in actual fact the Docker host I am using is itself a VM sitting on my ESXi server!
Getting Started:
Docker will run on pretty much ANY OS. I like to use linux (specifically ubuntu) for my servers since it's something I've been using for a long time I am comfortable with it. So we'll look at how we can deploy docker on an ubuntu server 16.04 (xenial) machine to use as our docker host.
Prerequisites:
- Ubuntu 16.04 Installed and running (VM, or baremetal)
- An active internet connection - We'll be pulling the docker binaries and images from online
- Some knowledge of linux CLI
Always refer to the official documentation to install Docker which can be found here: https://docs.docker.com/engine/installation/linux/ubuntulinux/
However if you want a quick overview of commands to run (specifically for ubuntu 16.04), here's what you can do:
Update current repos:
apt-get update
apt-get upgrade
Add repo keys & repository & then update:
sudo apt-key adv --keyserver hkp://p80.pool.sks-keyservers.net:80 --recv-keys 58118E89F3A912897C070ADBF76221572C52609D
sudo apt-add-repository 'deb https://apt.dockerproject.org/repo ubuntu-xenial main'
apt-get update
Confirm source of docker-engine is the new repo:
apt-cache policy docker-engine
Install the engine:
apt-get install docker-engine
Check the status of the service:
service docker status
You should now have access to the docker command:
root@dchidell-ubuntu:/home/david# docker --help
Usage: docker [OPTIONS] COMMAND [arg...]
       docker [ --help | -v | --version ]

A self-sufficient runtime for containers.

Options:

  --config=~/.docker              Location of client config files
  -D, --debug                     Enable debug mode
  -H, --host=[]                   Daemon socket(s) to connect to
  -h, --help                      Print usage
  -l, --log-level=info            Set the logging level
  --tls                           Use TLS; implied by --tlsverify
  --tlscacert=~/.docker/ca.pem    Trust certs signed only by this CA
  --tlscert=~/.docker/cert.pem    Path to TLS certificate file
  --tlskey=~/.docker/key.pem      Path to TLS key file
  --tlsverify                     Use TLS and verify the remote
  -v, --version                   Print version information and quit

Commands:
    attach    Attach to a running container
    build     Build an image from a Dockerfile
    commit    Create a new image from a container's changes
    cp        Copy files/folders between a container and the local filesystem
    create    Create a new container
    diff      Inspect changes on a container's filesystem
    events    Get real time events from the server
    exec      Run a command in a running container
    export    Export a container's filesystem as a tar archive
    history   Show the history of an image
    images    List images
    import    Import the contents from a tarball to create a filesystem image
    info      Display system-wide information
    inspect   Return low-level information on a container, image or task
    kill      Kill one or more running containers
    load      Load an image from a tar archive or STDIN
    login     Log in to a Docker registry.
    logout    Log out from a Docker registry.
    logs      Fetch the logs of a container
    network   Manage Docker networks
    node      Manage Docker Swarm nodes
    pause     Pause all processes within one or more containers
    port      List port mappings or a specific mapping for the container
    ps        List containers
    pull      Pull an image or a repository from a registry
    push      Push an image or a repository to a registry
    rename    Rename a container
    restart   Restart a container
    rm        Remove one or more containers
    rmi       Remove one or more images
    run       Run a command in a new container
    save      Save one or more images to a tar archive (streamed to STDOUT by default)
    search    Search the Docker Hub for images
    service   Manage Docker services
    start     Start one or more stopped containers
    stats     Display a live stream of container(s) resource usage statistics
    stop      Stop one or more running containers
    swarm     Manage Docker Swarm
    tag       Tag an image into a repository
    top       Display the running processes of a container
    unpause   Unpause all processes within one or more containers
    update    Update configuration of one or more containers
    version   Show the Docker version information
    volume    Manage Docker volumes
    wait      Block until a container stops, then print its exit code

Run 'docker COMMAND --help' for more information on a command.
root@dchidell-ubuntu:/home/david#
Proxy Access:
This section only applies if you're running Docker behind a HTTP/S proxy. In one of my environments I am, so I've decided to cover it here just in case. If you're not running behind a proxy server then you can safely ignore this section and move on.
You've probably already had to work around proxy issues given that you've just had to install docker using the apt-get process. This is easy enough using the export http_proxy=http://proxyip:port command. However this is not something docker can use, so we'll have to dive a little deeper.
Upstart:
Edit this file: /etc/default/docker
You'll notice a section with the following:
# If you need Docker to use an HTTP proxy, it can also be specified here.
#export http_proxy="http://127.0.0.1:3128/"
Uncomment the second line and adjust it accordingly, then restart the docker service:
service docker restart
Systemd:
Create the following file: /etc/systemd/system/docker.service.d/http-proxy.conf (You may need to create the directory too).
Enter the following:
[Service]
Environment="http_proxy=test.blah.com" "https_proxy=test.blah.com"
You'll then want to reload systemd and restart docker:
systemctl daemon-reload
systemctl restart docker
That's it!
Terminology:
Now we've got docker installed it's time for a bit more theory on the terms we'll be using throughout the rest of the post.
Container - This is the big one. Containers are the actual constructs we'll create and manipulate using Docker.
Image - You can think of this as a template of a container. Images are pulled from repositories.
Repository - An online store where images can be found. Docker Hub is the default and most common and can be found here: https://hub.docker.com/explore/
Network - A logical networking instance used to contain and segment containers with respect to addressing and application access.
Basic Commands:
Just to give you a bit of confidence when managing containers, I've listed pretty much all the commands you'll need below to get started. We'll cover most of them in a bit more depth later.
docker ps -a - Displays containers. The -a attribute shows ALL containers. By default only running containers are displayed.
docker images - Displays images which have been downloaded from repositories or created manually from existing containers or Dockerfiles.
docker start x - Starts container X
docker stop x - Stops container X
docker restart x - Restarts container X
docker run y - Runs the image Y as a container. This container will get an automatically generated name. This command will be elaborated on later.
docker create y - Creates but does not run a container. Similar to run apart from doesn't start the container.
docker stats - Displays real-time statistics for containers on the current host, including CPU, memory, disk and network IO.
docker rm x - Deletes container X
docker logs x - Displays the log for container X
docker exec x z - Executes command Z on container X.
Our first container:
Now we've got a few commands out of the way let's get into creating a container.
It's worth noting that a container only stays running when the process defined within it stays alive. Since busybox is essentially an empty system with no applications we want to run we have to attach to the shell when we run it, like so:
root@dchidell-ubuntu:/home/david# docker run -it busybox
Unable to find image 'busybox:latest' locally
latest: Pulling from library/busybox
4b0bc1c4050b: Pull complete
Digest: sha256:817a12c32a39bbe394944ba49de563e085f1d3c5266eb8e9723256bc4448680e
Status: Downloaded newer image for busybox:latest
/ #
/ #
The docker run command we have utilizes the -it parameters. This means we're going to keep the session interactive, and open a TTY terminal to it. As a result we get the busybox shell.
If we exit from the shell and check the running containers with docker ps -a we'll notice that we have a busybox container but it's no longer running since the shell process (/bin/sh) exited.
/ #
/ # exit
root@dchidell-ubuntu:/home/david#
root@dchidell-ubuntu:/home/david#
root@dchidell-ubuntu:/home/david# docker ps -a
CONTAINER ID        IMAGE               COMMAND             CREATED              STATUS                     PORTS               NAMES
9350bc2d3b12        busybox             "sh"                About a minute ago   Exited (0) 3 seconds ago                       nostalgic_stonebraker
root@dchidell-ubuntu:/home/david#
We can also see from the above that we can see some basic information about our shiny new container.
The container ID is generated automatically and is a reference to that container.
The Name is also automatically generated (you can specify it manually). The names given to containers are always fairly amusing, in my case nostalgic_stonebraker.
The image we used to create the container.
We can now restart the container using docker start nostalgic_stonebraker we could also use the container ID instead of the name to start it.
root@dchidell-ubuntu:/home/david# docker start nostalgic_stonebraker
9350bc2d3b12
root@dchidell-ubuntu:/home/david#
Notice this time we've got no shell, but it's actually running in the background now since the create command allocated a TTY line for the command to run in.
We can attach to the existing process using docker attach nostalgic_stonebraker:
root@dchidell-ubuntu:/home/david# docker attach nostalgic_stonebraker
/ #
/ #
If we exit now, it'll stop the container again:
/ #
/ # exit
root@dchidell-ubuntu:/home/david# docker ps -a
CONTAINER ID        IMAGE               COMMAND             CREATED             STATUS                     PORTS               NAMES
9350bc2d3b12        busybox             "sh"                22 minutes ago      Exited (0) 2 seconds ago                       nostalgic_stonebraker
root@dchidell-ubuntu:/home/david#
We can avoid this by getting into the container differently, by using docker exec. First let's start the container again and make sure it's running:
root@dchidell-ubuntu:/home/david# docker start nostalgic_stonebraker
nostalgic_stonebraker
root@dchidell-ubuntu:/home/david#
root@dchidell-ubuntu:/home/david#
root@dchidell-ubuntu:/home/david# docker ps -a
CONTAINER ID        IMAGE               COMMAND             CREATED             STATUS              PORTS               NAMES
9350bc2d3b12        busybox             "sh"                23 minutes ago      Up 2 seconds                            nostalgic_stonebraker
root@dchidell-ubuntu:/home/david#
Now we can execute a new command, if we execute a new shell, we can exit from it without stopping the original process. We can also check which processes are running, and we can see two instances of 'sh':
root@dchidell-ubuntu:/home/david# docker exec -it nostalgic_stonebraker /bin/sh
/ #
/ #
/ # ps
PID   USER     TIME   COMMAND
    1 root       0:00 sh
    7 root       0:00 /bin/sh
   13 root       0:00 ps
/ #
/ #
The -it does the same thing as when we created the container, we want an interactive terminal so we can execute commands.
Now if we exit, the container continues running:
/ #
/ # exit
root@dchidell-ubuntu:/home/david#
root@dchidell-ubuntu:/home/david# docker ps -a
CONTAINER ID        IMAGE               COMMAND             CREATED             STATUS              PORTS               NAMES
9350bc2d3b12        busybox             "sh"                27 minutes ago      Up About a minute                       nostalgic_stonebraker
root@dchidell-ubuntu:/home/david#
Voila! You've just successfully run and manipulated your first container!
Now let's remove it!
As you can see it's still running, so we'll stop it and then remove it:
root@dchidell-ubuntu:/home/david# docker ps -a
CONTAINER ID        IMAGE               COMMAND             CREATED             STATUS              PORTS               NAMES
9350bc2d3b12        busybox             "sh"                27 minutes ago      Up About a minute                       nostalgic_stonebraker
root@dchidell-ubuntu:/home/david#
root@dchidell-ubuntu:/home/david#
root@dchidell-ubuntu:/home/david#
root@dchidell-ubuntu:/home/david#
root@dchidell-ubuntu:/home/david# docker ps -a
CONTAINER ID        IMAGE               COMMAND             CREATED             STATUS              PORTS               NAMES
9350bc2d3b12        busybox             "sh"                28 minutes ago      Up 3 minutes                            nostalgic_stonebraker
root@dchidell-ubuntu:/home/david#
root@dchidell-ubuntu:/home/david# docker stop nostalgic_stonebraker
nostalgic_stonebraker
root@dchidell-ubuntu:/home/david# docker rm nostalgic_stonebraker
nostalgic_stonebraker
root@dchidell-ubuntu:/home/david# docker ps -a
CONTAINER ID        IMAGE               COMMAND             CREATED             STATUS              PORTS               NAMES
root@dchidell-ubuntu:/home/david#
Working with Images:
We can see the images we have locally downloaded using docker images:
root@dchidell-ubuntu:/home/david# docker images
REPOSITORY          TAG                 IMAGE ID            CREATED             SIZE
busybox             latest              7968321274dc        45 hours ago        1.11 MB
root@dchidell-ubuntu:/home/david#
We can remove images using docker rmi. Let's remove the busybox image we have:
root@dchidell-ubuntu:/home/david# docker rmi 7968321274dc
Untagged: busybox:latest
Untagged: busybox@sha256:817a12c32a39bbe394944ba49de563e085f1d3c5266eb8e9723256bc4448680e
Deleted: sha256:7968321274dc6b6171697c33df7815310468e694ac5be0ec03ff053bb135e768
Deleted: sha256:38ac8d0f5bb30c8b742ad97a328b77870afaec92b33faf7e121161bc78a3fec8
root@dchidell-ubuntu:/home/david#
root@dchidell-ubuntu:/home/david# docker images
REPOSITORY          TAG                 IMAGE ID            CREATED             SIZE
root@dchidell-ubuntu:/home/david#
We can pull new images using docker pull. This can be useful to download images before issuing a docker run. If the image doesn't exist when using docker run it will be pulled first.
root@dchidell-ubuntu:/home/david# docker pull ubuntu
Using default tag: latest
latest: Pulling from library/ubuntu
b3e1c725a85f: Pull complete
4daad8bdde31: Pull complete
63fe8c0068a8: Pull complete
4a70713c436f: Pull complete
bd842a2105a8: Pull complete
Digest: sha256:7a64bc9c8843b0a8c8b8a7e4715b7615e4e1b0d8ca3c7e7a76ec8250899c397a
Status: Downloaded newer image for ubuntu:latest
root@dchidell-ubuntu:/home/david#
root@dchidell-ubuntu:/home/david# docker images
REPOSITORY          TAG                 IMAGE ID            CREATED             SIZE
ubuntu              latest              104bec311bcd        4 weeks ago         129 MB
root@dchidell-ubuntu:/home/david#
Networking:
One of my first thoughts on docker was, how on earth does the networking work? As a networking guy it's quite important for me to understand what sort of firewall / NAT rules I need to add to get these things working.
By default docker deploys with 3 networks. bridge, host and none.
Bridge - Do NOT think this means the same as bridged networking in VMware! Bridged networking in this instance means a container will get an IP address in a private range sitting behind the host. This address is then NATted using NAT overload or PAT from a networking term. This means that this container can access the internet and any other resource that the host can reach. This is the default networking method if nothing else is specified.
Host - This is where the container shares the host's networking. So there is no IP on the container and any ports used by the container will be directly exposed. For example, if a webserver is listening on port 80 in a container, that webserver will be accessible by navigating to http://hostip
None - No networking! Easy!
You can create your own networks, this could be useful if you have multiple containers which need to talk to each other but not be accessed by anything else. A single container (e.g. a load balancer) may then talk out of this private network and be accessed by the outside world. Creating your own networks is outside the scope of this post but is covered in detail here: https://docs.docker.com/engine/userguide/networking/
For the most part we'll want to use the bridge network. This allows us to map specific ports to the outside world (essentially port-forwarding) without configuring anything else. We can do this using the -p src:dst flag when creating or running (if they've not already been created) containers.
E.g. say we wanted to create a webserver application (we'll cover this in more detail in the next section), we might have a create statement which looks like the following:
docker create \
-p 2080:80 \
nginx
This will create an nginx webserver container, which will be accessible from http://hostip:2080
This is exceptionally useful when running multiple copies of the same service on a single machine, since it allows ports to be re-mapped to different external ports and therefore allows the application to have agnostic configuration (i.e. nginx is still listening on port 80).
Something useful which is worth mentioning at this point is sometimes you want to quickly test containerised applications without having to screw around specifying port numbers here there and everywhere. For this what you can do is to leave the container as the default, on the bridged network, and not specify any ports. However next is the clever part: SSH tunnels!
By using a dynamic SSH tunnel to the docker host, you can put your own client (i.e your desktop PC you're sitting at) on the same network as the docker host, and have full access to all of the containers on that host by using their private IP. This dynamic SSH tunnel should be created in something like putty (if you're on windows) and then a SOCKS proxy added using 127.0.0.1:port within the web browser. You can then access a containers' applications directly using the private IP. The private IP can be found using docker network inspect bridge. This will list each container, it's name, and IP address. This of course only applies if you're running a web application. Some other applications have SOCKS support and can use this method but it's not a complete solution.
Storage:
As I mentioned in the introduction, one of the benefits (at least I find) in using containers is the ease of which you can keep configuration, application data and application binaries separate.
If we take a look at the nginx example we used in the networking section, we can quickly define these three types of data:
Configuration: Data found in /etc/nginx (i.e. /etc/nginx/nginx.conf and /etc/nginx/sites-enabled/*)
Application Data: The webpages themselves, found in (by default) /var/www/html.
Binary Data: The nginx binaries, and various libraries required by nginx.
So how can we keep these separate? Well the binary data already exists as part of a container so we only have to worry about application data and configuration. Generally it is desirable to keep these persistent, and the nature of containers means they don't exist for very long. It's easier to delete a container and re-create it than manually upgrade binaries if a new version of an application is out.
As such, we have to store the important stuff on persistent storage. We can map directories from the docker host to the container using the -v /src/dir:/dst/mountpoint flag. In that example, the directory /src/dir is mapped to /dst/mountpoint as a linux filesystem mount. All directories underneath the source will be visable on the destination.
Files can also be mapped using exactly the same syntax, but just specifying a file instead of a directory.
Read-only paths are also possible, and are particularly useful for immutable configuration.
E.g. say we wanted an nginx server which read configuration and application data from the host, we could do something as follows:
docker create \
-v /opt/containers/webserver/config:/etc/nginx/ \
-v /opt/containers/webserver/html:/var/www/html \
nginx
This would map two directories through to the container. We would then have to make sure our configuration existed in the appropriate host directory, and that in the configuration we referred to our content using the path the container sees. I.e. /var/www/html
Applications - The whole point!
One of the main uses for containers is to quickly deploy applications. So far we've looked at busybox, which is cool, but pretty useless by itself. So in this section we'll actually look at some common applications and now to expose them to the outside world.
First, let's download nginx. Nginx if you're not familiar with is it a webserver. It doesn't do it much justice to call it a webserver as it can perform quite a few tasks but it's primary use case is, in fact, a webserver.
Pull the image from the repo:
root@dchidell-ubuntu:/home/david# docker pull nginx
Using default tag: latest
latest: Pulling from library/nginx
75a822cd7888: Pull complete
0aefb9dc4a57: Pull complete
046e44ee6057: Pull complete
Digest: sha256:fab482910aae9630c93bd24fc6fcecb9f9f792c24a8974f5e46d8ad625ac2357
Status: Downloaded newer image for nginx:latest
root@dchidell-ubuntu:/home/david#
root@dchidell-ubuntu:/home/david# docker images
REPOSITORY          TAG                 IMAGE ID            CREATED             SIZE
nginx               latest              01f818af747d        2 weeks ago         181.6 MB
ubuntu              latest              104bec311bcd        4 weeks ago         129 MB
root@dchidell-ubuntu:/home/david#
Time to create our container, note that I've also given it a meaningful name which is useful when manipulating the container. I'm going to stick to the example I used above for the networking:
docker create \
--name=webserver \
-v /opt/containers/webserver/config:/etc/nginx/ \
-v /opt/containers/webserver/html:/var/www/html/ \
-p 2080:80 \
nginx
root@dchidell-ubuntu:/home/david# docker create \
> --name=webserver \
> -v /opt/containers/webserver/config:/etc/nginx/ \
> -v /opt/containers/webserver/html:/var/www/html \
> -p 2080:80 \
> nginx
f1d69d3441cf4865df5e86447b0a67136fe9717f60efad4310323e2d63274922
root@dchidell-ubuntu:/home/david#
Start the container:
docker start webserver
root@dchidell-ubuntu:/home/david# docker start webserver
webserver
root@dchidell-ubuntu:/home/david# docker ps -a
CONTAINER ID        IMAGE               COMMAND                  CREATED             STATUS              PORTS                           NAMES
f1d69d3441cf        nginx               "nginx -g 'daemon off"   27 seconds ago      Up 3 seconds        443/tcp, 0.0.0.0:2080->80/tcp   webserver
root@dchidell-ubuntu:/home/david#
We can see now that we have two ports listed: 443 and 80. Port 80 is redirected from 2080 but port 443 is what's called 'exposed'. This means that a service might be listening on port 443 but we've not mapped it though to any external port.
If we now try and access our host IP on port 2080 via HTTP we get the following:
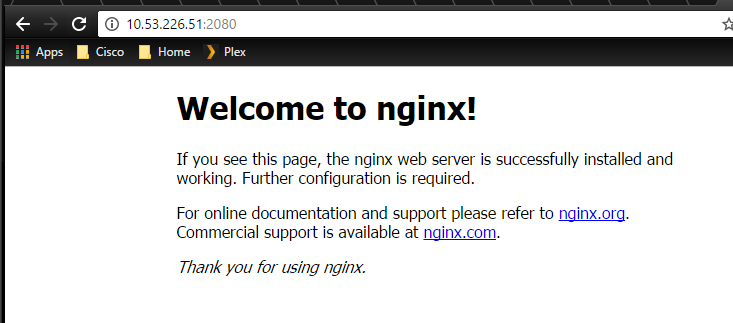
Success!
Custom Containers
The docker hub repository provides some excellent images we can use, another of my favourite repos is provided by the folks at http://linuxserver.io and they have a fantastic collection of containers here: http://tools.linuxserver.io/dockers
However sometimes it is desirable to create your own container images. For example, I wanted a webserver (nginx) which also was capable of processing PHP scripts using php7.0-fpm. I wasn't able to find a container with this all bundled in, so decided to make my own.
There are a few different mechanisms you can use to create your own, but two primary methods:
- Create a container, customise it and commit it - This takes an existing container and bundles it into an image you can deploy over and over.
- Use a dockerfile to build the container from scratch all at once - This uses a source container (often a lightweight image, e.g. ubuntu) and installs various packages and configures the system to be ready to run the applications required. It is much more automated than the first option.
To use the first option, you simple need to use docker commit on the container you've built:
root@dchidell-ubuntu:/home/david# docker commit webserver my-webserver
sha256:7c870fce360dfded4615a7beb23d7d1982b0d84464fb70f3334726ffb5a87e8e
root@dchidell-ubuntu:/home/david# docker images
REPOSITORY          TAG                 IMAGE ID            CREATED             SIZE
my-webserver        latest              7c870fce360d        3 seconds ago       181.6 MB
nginx               latest              01f818af747d        2 weeks ago         181.6 MB
ubuntu              latest              104bec311bcd        4 weeks ago         129 MB
root@dchidell-ubuntu:/home/david#
As you can see, I've created a new image called 'my-webserver' based on the nginx webserver I created above. There is little point in this container, as there's no difference between it and the default nginx container, but it demonstrates how to create your own image.
For the second option, you need an empty directory and inside it contains the bits and pieces your container will use. The most important of these is a file called Dockerfile. For my php-nginx container I used the following definition:
FROM ubuntu:latest
RUN apt-get update && apt-get install -y --no-install-recommends php7.0 nginx
RUN apt-get clean
EXPOSE 80
CMD service php7.0-fpm start && service nginx start && tail -f /dev/null
This essentially takes the latest ubuntu release, installs php7.0 and nginx, tells docker that services running on it will be running on port 80, then issues the command used to run the container. For more information on dockerfiles see the official documentation: https://docs.docker.com/engine/tutorials/dockerimages/
Finally you'll need to build this using docker build from inside the directory container the dockerfile:
docker build -t php-nginx .
This specifies the tag as php-nginx, and uses the current directory . to build the image (docker will automatically look for the filename 'Dockerfile').
Final Points
Starting containers on system startup
You can use the --restart flag to define a restart policy when creating a container. Using --restart=always will restart a container if it crashes, as well as makes it start on system startup. Personally I don't like this because if a container crashes I want it to stay dead, so I can troubleshoot why it crashed. But I do want containers to start on startup. So I've actually used the approach of starting containers using the linux host itself by editing /etc/rc.local and adding entries like the following:
sudo docker start syncthing
sudo docker start portainer
sudo docker start webserver
exit 0
Upgrade warning!
Be careful when upgrading docker. I did an apt-get update and apt-get upgrade on my host. Which promptly killed all my running containers, thinking about it this isn't particularly surprising but it's something to be wary of if you need to schedule maintenance windows for the applications which are in containers.
Storing Container Definitions:
I'm not quite sure the best way to do this, but I've taken to the habit of storing my container create statements within a text file, so I can easily re-create containers if I want to change some parameters. E.g. my actual webserver create statement looks like the following:
docker create \
--name=webserver \
-v /mnt/nas/NFS/docker/webserver_config/nginx.conf:/etc/nginx/nginx.conf:ro \
-v /mnt/nas/NFS/docker/webserver_config/logs:/logs \
-v /mnt/nas/NFS/docker/webserver_config/sites:/sites \
-v /mnt/nas/NFS/docker/picserver_config/pics:/pics \
-v /mnt/nas/NFS/docker/webserver_config/www:/www \
-e PGID=0 -e PUID=0  \
-p 2080:80 \
php-nginx
Summary:
It is worth mentioning that I've only been experimenting with Docker for a few days, and there's still multiple aspects I would like to explore, including:
- Docker Swarm
- Automation using the REST API
- Local repos / registries
- Extended dockerfile configuration
- Much more that I don't even know exists...
I suspect I'll be writing separate posts on these points later down the line, but for now I think I'm done with this post, time to get a bacon sandwich.
Useful Snippets:
Here are a few useful commands I've used for various bits and pieces:
Remove all containers: docker rm $(docker ps -aq)
Find unused images: docker images --filter dangling=true
Remove unused images: docker rmi $(docker images --filter dangling=true)